Cinemachine is a game-changer in the world of camera development for Unity. It offers a comprehensive suite of camera tools that empower developers to create stunning visuals and deliver an immersive gameplay experience. With Cinemachine, you have the ability to go beyond the limitations of traditional camera setups and unlock a new level of creativity.
One of the standout features of Cinemachine is its versatility. It provides developers with a wide range of controls and options to customize camera behavior according to their specific needs. Whether you’re working on a first-person shooter, a platformer, or an open-world adventure, Cinemachine has the tools to make your camera truly shine. By integrating Cinemachine into your project, you gain access to advanced functionalities such as dynamic camera tracking, smooth transitions, and intelligent framing. These features allow you to create seamless camera movements that adapt to the player’s actions, resulting in a more immersive and cinematic experience.
Furthermore, Cinemachine simplifies the camera creation process. You can easily enhance existing cameras by adding Cinemachine components and fine-tuning their properties, or you can start from scratch and build entirely new cameras with unique behaviors. This flexibility empowers developers to push the boundaries of what is possible in terms of camera design and functionality.
Another advantage of using Cinemachine is its seamless integration with other Unity features and assets. Whether you’re working with animation systems, physics simulations, or audio tools, Cinemachine seamlessly integrates with these components, allowing for a cohesive and streamlined development process. Cinemachine is a game-changer for camera development in Unity. Its powerful and versatile suite of tools opens up a world of possibilities for developers, enabling them to create visually stunning and immersive experiences. Whether you’re a seasoned developer or just starting out, Cinemachine is a valuable asset that will take your camera work to the next level.
In this particular demo, we will focus on utilizing Cinemachine for player-following cameras. While Cinemachine offers a wide range of capabilities for various purposes, we will specifically explore how it can be used to create a seamless and immersive player-following camera experience.

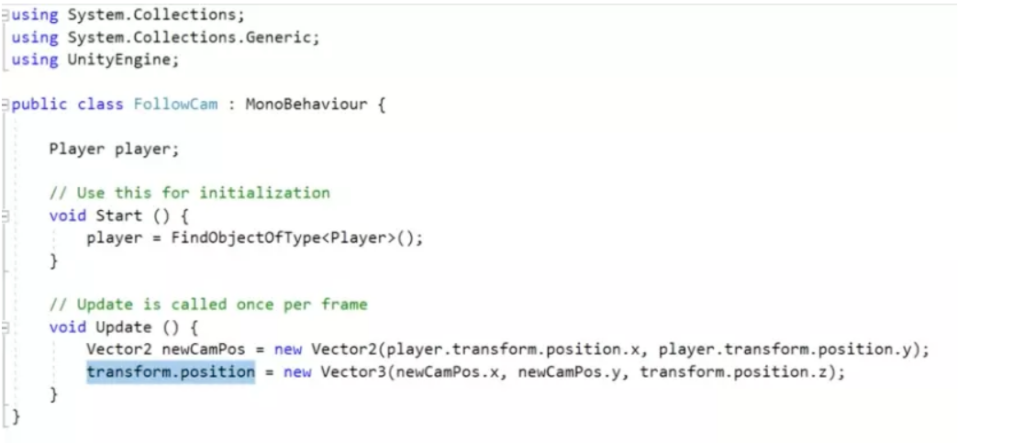
In many cases, developers who are unfamiliar with Cinemachine tend to rely on outdated methods to make the camera follow the player, as depicted in the image above.
Creating a Follow Camera Using Cinemachine
Creating a follow camera using Cinemachine is a game development technique that adds a dynamic and engaging perspective to your project. By implementing Cinemachine, you can achieve smooth and intuitive camera movement that follows the player’s actions seamlessly. This technique is particularly useful in various game genres such as platformers, adventure games, and even first-person shooters.
With Cinemachine, you have the flexibility to define how the camera behaves and interacts with the player. You can set parameters such as damping, dead zones, and follow speed to create a personalized camera experience. The camera will smoothly track the player’s movements, keeping them in focus and providing a clear view of the game world.
One of the major advantages of using Cinemachine for a follow camera is its modularity and ease of use. Cinemachine provides a wide range of tools and components that can be easily integrated into your existing camera system or used to create new cameras from scratch. You can organize your cameras within a dedicated game object, making it easier to manage and control multiple cameras in your scene. Cinemachine offers advanced features like virtual cameras and camera blending, allowing for seamless transitions between different camera perspectives. This adds depth and cinematic flair to your game, enhancing the overall player experience.
Implementing a follow camera using Cinemachine not only improves gameplay but also adds a professional touch to your project. It provides the level of control and polish typically seen in AAA games, elevating the overall quality of your game.
Before diving into the process, make sure to follow these initial steps:
- Create a new empty project in your preferred development environment.
- Set the aspect ratio of the game view to 16:9 for optimal display.
- Download the project files from the provided link (https://github.com/Brackeys/2D-Shooting) and import them into your current project.
- Locate the scene file with the name “main” and open it.
- Visit the asset store and import the Cinemachine package into your project to gain access to its functionality and features.
Step 1: Adding the “Cinemachine Brain” Script to the Main Camera
Locate the Main Camera in the hierarchy panel.
In the Inspector panel, click on the “Add Component” button.
Type “Cinemachine Brain” in the search bar and select it to add the Cinemachine Brain script to the Main Camera.
Step 2: Creating an Empty Game Object for Camera Organization
Create a new empty game object to serve as a container for your cameras.
Name this game object “cameras” for clarity.
Reset the transform of the “cameras” game object to its default position and rotation.
Drag the Main Camera and place it as a child of the “cameras” game object. This helps in organizing the cameras in your scene.
Step 3: Creating a Cinemachine 2D Camera

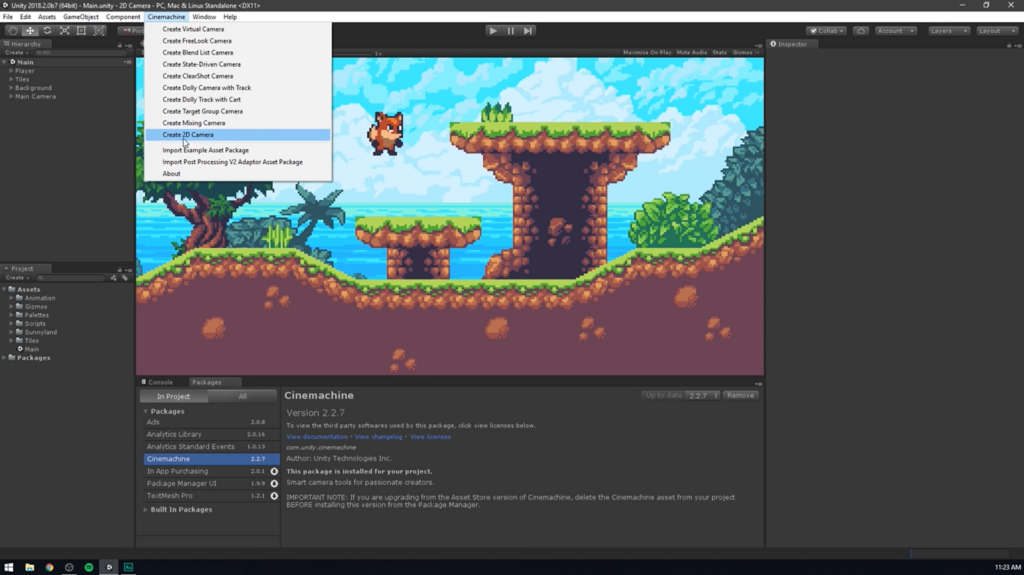
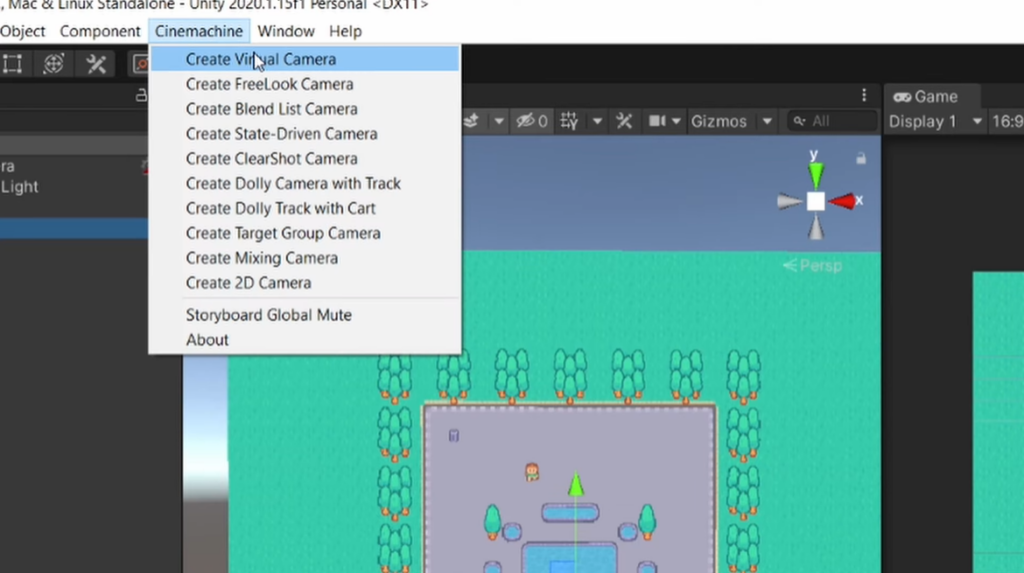
Go to the Cinemachine menu and select “Create 2D Camera.”
This action will create a new object named “CM vcam1” in the hierarchy, representing the Cinemachine virtual camera.
Step 4: Assigning the Parent Game Object to the Cinemachine Camera
Under the “cameras” game object in the hierarchy, drag and place the “CM vcam1” object.
Step 5: Setting the Follow Target for the Follow Camera
Drag the player object from the hierarchy and drop it onto the “CM vcam1” object.

Specifically, assign the player object to the “Follow” property of the Cinemachine Virtual Camera component, which is nested under the “CM vcam1” object.
Step 6: Important Notes
Now that our camera follower is partially ready, there are a few important things to note:
The camera has a limited field of view, indicated by the blue portion in the image below. Anything outside this area will not be visible to the camera.
The red portion indicates areas that the camera cannot view at all.
In your project, you will notice a yellow dot (middle reference point) indicating where the camera is currently looking.
The rectangular space created by four white arrows (as highlighted in the image below) represents the dead zone. If the player character stays within this zone, the camera will not move. It’s only when the player reaches the edge of the dead zone that the camera begins to follow.
Step 7: Setting the Camera Properties
Ensure that you have selected the “Framing Transposer” option. If not, you may not see all the available properties.
Step 8: Observing the Effect of Property Changes on the Player
Experiment with changing the values of properties such as X damping, Y damping, Dead Zone Width, and Dead Zone Height to zero.
As you make these changes, you will notice that the camera becomes locked directly onto the player, which may be suitable for certain types of games.
Running the scene at this point may feel jarring, especially during jumps, as the camera follows the player too closely.
To address this, gradually increase the X and Y damping values and adjust the Dead Zone Width.
By fine-tuning these parameters, you can achieve a smoother camera follow effect. Play around with the settings to find the desired balance between player movement and camera responsiveness.
Conclusion
Using Cinemachine, you have the ability to create smooth and dynamic camera movements, allowing for a more immersive and engaging player experience. The flexibility and versatility of Cinemachine enable you to customize and fine-tune the camera behavior to suit the specific requirements of your game.
By implementing a follow camera, you can ensure that the player’s movements are accurately tracked and that the camera seamlessly follows their actions, providing a clear view of the game world. This enhances the player’s spatial awareness and immersion, resulting in a more enjoyable and immersive gameplay experience.
Incorporating a follow camera using Cinemachine is a valuable addition to your game development toolkit. It offers the potential to elevate the overall quality and professionalism of your game, providing a polished and visually appealing experience for players.
Now that you have gained a solid understanding of the steps involved in creating a follow camera using Cinemachine, you can confidently integrate this feature into your game development projects. Embrace the power of Cinemachine and unleash the full potential of your games with captivating camera movements and immersive player experiences.