An Overview
In this section, we delve into the crucial elements of effectively managing resources in Unity Engine, including optimizing loading times and efficiently utilizing memory. We provide an in-depth examination of the resource lifecycle and offer valuable insights on accessing assets stored in the Resources folder. Discover how this robust system empowers you to organize assets within specific folders and dynamically load or unload objects using the powerful Resources API.
Limitation
Gain valuable knowledge about the limitations of using the Resources folder in Unity. While it eliminates the need for path-based asset access, it’s important to understand that all asset sizes within the Resources folder are consumed during player builds, regardless of usage. Learn how to streamline your builds by removing unnecessary assets from the Resources folder, and optimizing your game’s overall performance.
Advantage
Uncover the advantages of leveraging Unity’s Resources system. Discover scenarios where accessing assets by name proves more efficient than linking them in the inspector. Simplify your workflow by dynamically creating game objects from scripts and easily assigning textures to procedurally generated meshes without the need for manual inspector references.
Steps to Access Assets from Resources
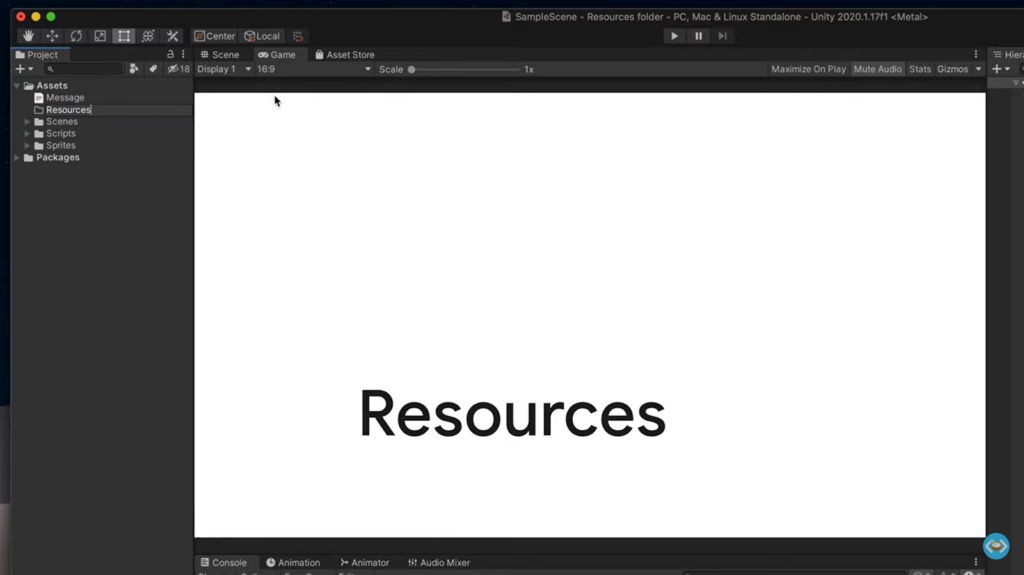
Step 1: Creating the Resources Folder
To access assets from the Resources folder, you need to create a dedicated folder with the name “Resources.”
Note: It’s important to note that Unity doesn’t create the Resources folder automatically when you start a new project.
Renaming the Folder to “Resources”
Step 2: Creating an Asset Manager Game Object
- Open Unity: Launch the Unity Editor and open your project.
- Create a new Game Object: In the Hierarchy window, right-click and select “Create Empty” to create a new empty Game Object.
- Rename the Game Object: Right-click on the newly created Game Object and choose “Rename.” Give it a descriptive name, such as “Asset Manager.”
- Customize the Game Object: With the Asset Manager Game Object selected, you can now add components and modify their properties to suit your needs. For example, you might attach scripts that handle asset management functionalities.
- Save the Scene: It’s good practice to save your scene to preserve your changes. Go to “File” -> “Save Scene” and choose a location to save the scene file.
- Utilize the Asset Manager: You can now utilize the Asset Manager Game Object to manage your assets. This may involve loading, unloading, or manipulating assets during runtime based on your project requirements.
- Rename the newly created game object to “Asset Manager” for easy identification.
Step 3: Creating a New C# Script and Declaring the Public Game Object
- Open Unity: Launch the Unity Editor and open your project.
- Create a new C# script: In the Project window, right-click on the folder where you want to create the script. Select “Create” -> “C# Script” from the context menu. Give it a descriptive name, such as “MyScript”.
- Open the script: Double-click on the newly created script to open it in your preferred code editor.
- Declare a public Game Object: Inside the script, declare a public variable of type Game Object. For example, you can add the following line of code:

This creates a public Game Object variable named “myGameObject” that you can access and assign in the Unity Editor.
- Save the script: Save the changes you made to the script in your code editor.
- Attach the script to a Game Object: In the Unity Editor, select a Game Object in the Hierarchy window to which you want to attach the script. In the Inspector window, click on the “Add Component” button, search for your script name (e.g., “MyScript”), and click on it to attach the script to the selected Game Object.
- Assign a reference in the Inspector: With the Game Object selected, find the newly added script component in the Inspector window. You will see a public field for the declared Game Object variable (e.g., “My Game Object”). You can assign a reference to a specific Game Object in your scene by dragging and dropping it onto this field.
Step 4: Accessing Assets from the Resources Folder
In the case of my Resources folder, it consists of three main subfolders, including the Sprites folder where the desired sprite is located. It is important to ensure that the asset you want to access from the Resources folder has the correct folder structure and path.
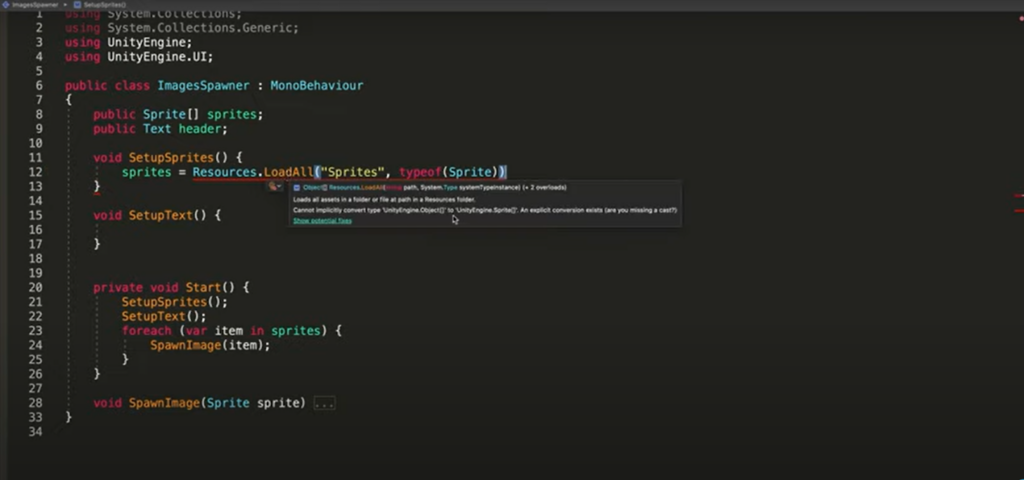
After loading the sprite, I assign it to a variable called “PlayerSprite” and subsequently assign this sprite to my Player sprite for further use.
Step 5: Applying the Script and Changing the Player Sprite
- Create a new C# script: Follow the steps mentioned earlier to create a new C# script and open it in your preferred code editor.
- Write code to change the player sprite: Inside the script, write code to change the sprite of the player. You can use the following code snippet as an example:
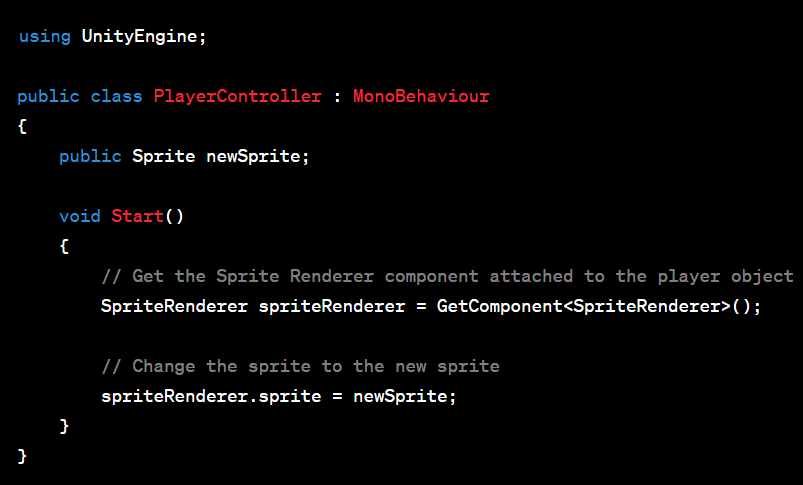
In this example, a public variable newSprite of type Sprite is declared. The Start() function is called when the script is initialized, and it retrieves the SpriteRenderer component attached to the player object. It then assigns the newSprite to the sprite property of the SpriteRenderer, changing the player’s sprite.
- Save the script: Save the changes you made to the script in your code editor.
- Apply the script to the player object: In the Unity Editor, select the player object in the Hierarchy window to which you want to apply the script. In the Inspector window, click on the “Add Component” button if the script is not already added. Search for your script name (e.g., “PlayerController”) and click on it to apply the script to the selected player object.
- Assign the new sprite: With the player object selected, find the newly added script component in the Inspector window. You will see a public field for the newSprite variable. Drag and drop the desired sprite onto this field to assign it to the player object.
Once the script is saved, apply it to the Asset Manager game object by attaching the script component to it. Next, assign the reference of our Player object from the hierarchy to the script.
Static Methods Related to Resources and Their Functions
FindObjectsOfTypeAll
This method returns a list of all objects of a specific type. For more details about this method, you can refer to the following link: FindObjectsOfTypeAll Documentation.
Load
This method loads an asset stored in a Resources folder at a specified path. More information about this method can be found here: Load Documentation.
LoadAll
This method loads all assets in a folder or file within the Resources folder. You can find additional details about this method in the following link: LoadAll Documentation.
LoadAsync
This method asynchronously loads an asset from a Resources folder based on a specified path. Refer to the link below for more information: LoadAsync Documentation.
UnloadAsset
This method unloads a specific asset from memory. For further details, you can visit: UnloadAsset Documentation.
UnloadUnusedAssets
This method unloads any unused assets from memory. More information can be found in the following documentation: UnloadUnusedAssets Documentation.
Conclusion
This article has covered the limitations and advantages of the resource folder in Unity, along with a step-by-step guide on how to access it. Additionally, a list of static methods related to resources and their respective documentation links has been provided for further exploration.