The post <em>Unity Play Animation: Pros And Cons For You </em> appeared first on Pad-TheGamers.
]]>Understanding Unity Animation and Animator Controller
In the realm of Unity animation, two key terms often arise Animation and Animator Controller. Before diving into creating animations, it’s crucial to grasp these concepts.
Animation:
- In Unity, “Animation” refers to any visual action tied to a game object;
- This can encompass movements, transformations, and even sprite changes;
- Animations are often saved as ‘.anim’ files and can be created directly in Unity or imported from external software.
Animator Controller:
- The “Animator Controller” is the control center for animations;
- It enables you to manage when and how animations play;
- Think of it as the conductor orchestrating the performance of your animations.
Creating Animation Clips in Unity
Before you can animate an object, you need an Animation Clip. Unity’s Animation system allows you to create or import these clips, which serve as the building blocks for your animations.
- Select the Object: Begin by selecting the object you want to animate within Unity’s Hierarchy;
- Access Animation Window: Go to ‘Window’ > ‘Animation’ > ‘Animation’ or simply press ‘Ctrl+6’;
- Creating a New Animation: In the Animation timeline window, click ‘Create’ to make a new animation;
- Record and Animate: With your animation clip set up, click the record button (red circle) and start animating by moving the object to the desired positions;
- Fine-tune with Curves: Refine the animation using animation curves under the ‘Curves’ tab for smoother motion.
Animator State Machines in Unity
An Animator State Machine controls how and when Animation Clips are played. Unity automatically attaches an Animator component to your game object when you create a new animation, allowing you to define states and transitions.
Playing an Animation Clip:
- If you have a single animation clip, attach the Animator component and Unity will play it automatically;
- For multiple clips, set up transitions in the Animator window.
Setting Default States:
- The orange-colored state in the Animator is the default, playing when the game starts;
- Right-click on a state and select ‘Set as default’ to change it.
Conditions for Animation Transitions:
- Transitions can be conditioned based on parameters;
- Create parameters (float, int, bool, trigger) in the Animator to control transitions.
Playing Animations from Scripts in Unity
To animate objects through scripts:
- Create a variable of type Unity Animator;
- Get the Animator component with GetComponent;
- Set parameters using SetFloat, SetInt, SetBool, or SetTrigger.
For instance, to set a float parameter named ‘myFloat’ to 3.5:
Animator anim;
void Start() {
    anim = GetComponent<Animator>();
    anim.SetFloat("myFloat", 3.5f);
}
Looping, Speed Adjustment, and Randomization
Looping an Animation:
- Select the animation clip and check the ‘Loop Time’ parameter in the inspector.
Speed Adjustment:
- You can change animation speed globally or adaptively:
- Globally: In the Animator window, set the ‘Speed’ parameter.
- Adaptively: Create a float variable and link it to animation speed based on the character’s movement speed.
Randomizing Animations:
- You can play animations randomly or start them at random frames;
- Use scripts to set random parameters for animation selection and playback.

Comparison Table
| Parameter | Unity Animation | Unity Animator Controller |
|---|---|---|
| Definition | It is a specific animation action or clip applied to an object in Unity. | It is a component that controls when and how animations are played on an object. |
| Creation | Animations can be created directly in Unity or imported from other applications. | Created as part of an Animator Controller, which is then applied to an object. |
| Animation Timing | Timing is managed directly within the clip. | Timing and transition conditions are managed within the Animator Controller. |
| Multiple Animations | Each clip represents a separate animation action. | Can manage multiple animation clips and their transitions. |
| Playing Animations from Scripts | To play animations from scripts, use Animation.Play(). | To play animations from scripts, use parameters within the Animator Controller. |
| Animation Speed Adjustment | Animation speed can be customized independently for each clip. | Animation speed is adjusted globally for the entire controller. |
| Conditional Transitions | Does not support conditional transitions between animations. | Supports conditional transitions based on parameters. |
| Complex Animations | Limited in handling complex animations. | Allows for the creation of complex animations with transitions between states. |
This table should help you better understand the differences between Unity Animation and Unity Animator Controller and choose the suitable tool for your project.
Video Explanation
In order to explain this topic in more detail, we have prepared a special video for you. Enjoy watching it!
Conclusion
In the dynamic world of Unity game development, mastering the intricacies of animation is essential. Understanding the nuances between Unity Animation and Unity Animator Controller can significantly impact the quality and efficiency of your game’s animation system.
Unity Animation serves as the foundation for individual animation clips. It allows you to create and import animations, adjusting their timing, speed, and transitions. This level of granularity can be ideal for simple animations but may fall short when dealing with complex character movements and interactions.
Enter Unity Animator Controller—a versatile tool that orchestrates the symphony of animations in your game. By offering the ability to manage multiple animation clips, conditional transitions, and complex state machines, it empowers developers to create lifelike character movements and interactive gameplay experiences.
While Unity Animation is perfect for standalone animations, Unity Animator Controller shines when you need seamless transitions, conditional logic, and fine-tuned control over animations. It’s the go-to choice for creating character behaviors, such as switching between walking, running, and jumping based on player input.
In conclusion, both Unity Animation and Unity Animator Controller have their unique strengths. Your choice should depend on your project’s complexity and requirements. Whether you’re crafting a casual mobile game or an immersive AAA title, mastering these animation tools is your key to bringing characters and objects to life in the Unity game engine.
The post <em>Unity Play Animation: Pros And Cons For You </em> appeared first on Pad-TheGamers.
]]>The post The Ultimate Guide to Creating 3D Games with Unity appeared first on Pad-TheGamers.
]]>Creating a 3D Unity game can be an exciting and rewarding experience, but it can also seem overwhelming for beginners. In this guide, we will walk you through the essential steps and provide you with valuable tips to help you embark on your journey of making a 3D Unity game. So, let’s dive in!
Setting Up Unity
Before you begin developing your 3D game, you need to set up Unity on your computer. Start by downloading and installing the latest version of Unity from the official website. Once installed, create a new Unity project and set the appropriate settings such as project name, location, and template.
Designing the Game Concept
Every successful game begins with a well-thought-out and engaging concept. The design of your game concept sets the stage for the entire development process. This step will serve as the foundation for your development process.
- Brainstorming and Ideation
Start by immersing yourself in the world of games. Play different games, analyze their mechanics, and identify what makes them enjoyable. Draw inspiration from various sources such as books, movies, art, and real-life experiences. Let your imagination run wild and generate multiple ideas for your game.
- Defining the Genre and Art Style
Consider the genre that best suits your game idea. Is it an action-packed shooter, a puzzle-solving adventure, a strategy-based simulation, or something entirely unique? Define the genre based on the core experience you want to offer players. Additionally, consider the art style that complements your game concept, whether it’s realistic, cartoonish, retro, or any other distinctive style.
- Gameplay Mechanics
Define the core gameplay mechanics that will make your game engaging and enjoyable. Will it involve exploration, puzzle-solving, combat, resource management, or a combination of various mechanics? Determine how players will interact with the game world and the challenges they will face. Experiment with different mechanics to find a unique and compelling gameplay experience.
- Overall Theme and Story
Craft a captivating theme and storyline that immerse players in your game world. Develop a narrative that complements the gameplay and creates a sense of purpose for the player’s actions. Consider the setting, characters, and conflicts that will drive the story forward. A well-crafted story can enhance player engagement and create an emotional connection with the game.
- Objectives and Challenges
Define clear objectives for players to achieve within your game. Whether it’s completing missions, solving puzzles, or reaching specific milestones, objectives provide players with a sense of progression and accomplishment. Additionally, design challenges and obstacles that test the player’s skills and offer opportunities for growth and learning.
- Target Audience
Identify your target audience based on the nature of your game concept. Consider factors such as age group, interests, gaming preferences, and skill level. Understanding your target audience will help you tailor the game experience to their expectations and create a more enjoyable and engaging product.
- Iteration and Feedback
Share your game concept with others, such as friends, fellow developers, or potential players, and gather feedback. Iterate your concept based on the feedback received, refining and improving it to make it more compelling and unique. Be open to constructive criticism and be willing to make necessary adjustments to enhance the overall experience.
Creating the Game Environment
The game environment is where your players will immerse themselves. Start by designing the 3D assets, such as characters, objects, and scenery, using 3D modeling software like Blender or Maya. Import these assets into Unity and construct your game world by placing and arranging them within the scene. Pay attention to scale, lighting, and textures to create a visually appealing environment.
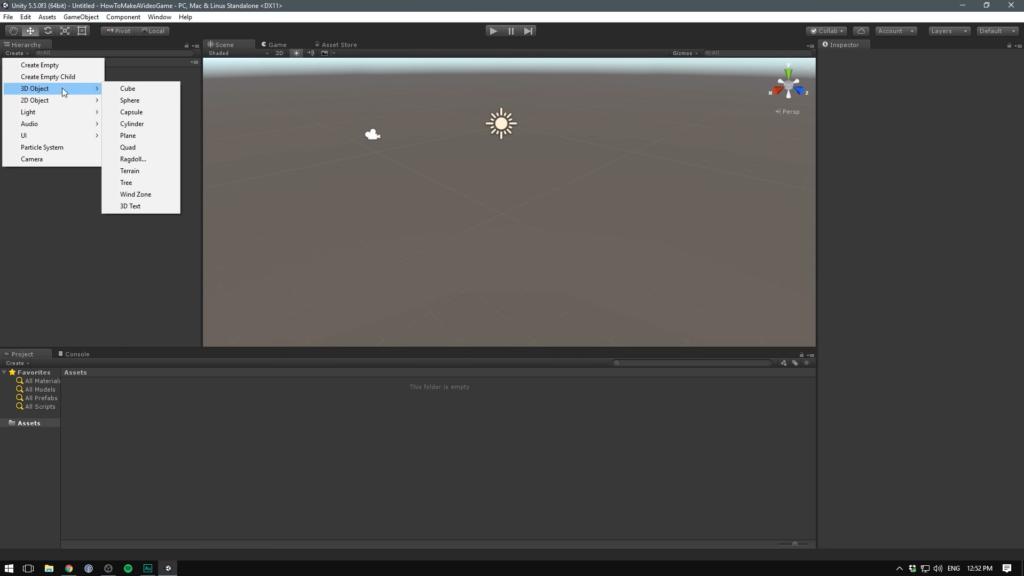
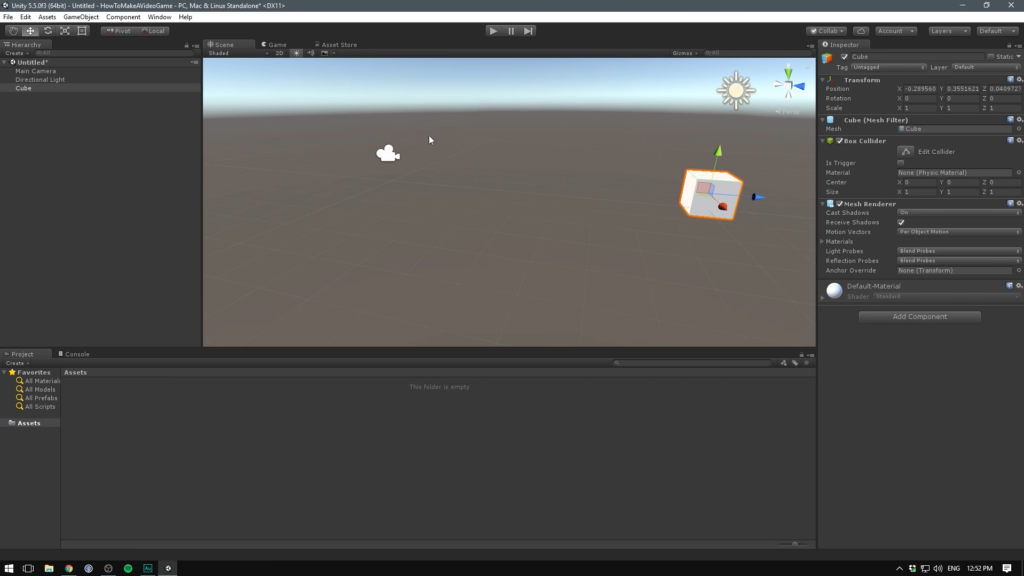
Creating the game environment in Unity involves several steps. Here’s a guide on how to do it:
- Designing Assets: Begin by designing the 3D assets for your game environment using 3D modeling software like Blender or Maya. Create characters, objects, and scenery that match your game’s theme and style;
- Importing Assets: Import the assets into your Unity project. Unity supports various file formats, such as FBX, OBJ, and DAE. Organize your assets into appropriate folders for easy access;
- Creating a Scene: In Unity’s Scene view, create a new scene or open an existing one. This is where you’ll construct your game environment. You can create multiple scenes to represent different levels or areas within your game;
- Placing Objects: Drag and drop the imported assets into the scene to place them within the environment. Use Unity’s Transform tools to position, rotate, and scale objects as needed;
- Terrain Creation: If your game requires terrain, use Unity’s Terrain system to create realistic landscapes. Customize the terrain’s height, texture, and foliage to match your game’s setting;
- Lighting: Set up lighting in your scene to create the desired atmosphere. Unity offers a range of lighting options, including directional, point, and spotlights. Experiment with different lighting settings to achieve the desired look;
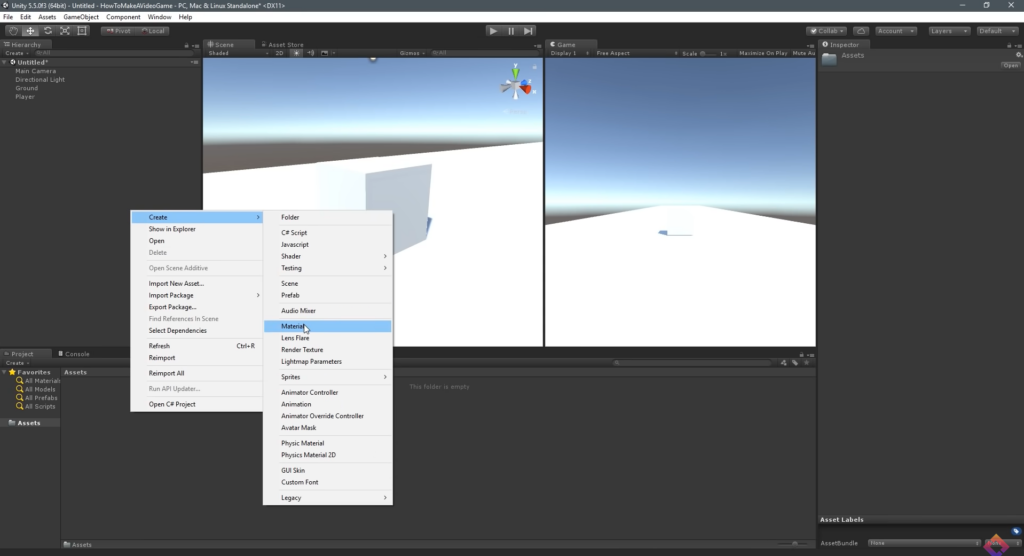
- Applying Materials and Textures: Apply materials and textures to your objects to give them realistic appearances. Unity’s Material system allows you to assign shaders, colors, textures, and other visual properties to your objects;
- Particle Effects: To add visual flair and dynamic elements to your game environment, consider using Unity’s Particle System. This powerful tool enables you to create effects like fire, smoke, water splashes, and more;
- Audio Integration: Enhance the immersion of your game environment by adding background music, sound effects, and ambient sounds. Use Unity’s Audio Source component to attach audio clips to specific objects or trigger them based on events;
- Testing and Iteration: Continuously playtest your game environment to ensure it provides a seamless and enjoyable experience. Make adjustments as necessary, refining the placement of objects, lighting, and effects until you achieve the desired outcome.
Implementing Gameplay Mechanics
This step involves scripting the functionality of your game. Unity uses C# as its primary programming language. Start by creating scripts for player movement, interaction with objects, and any other gameplay mechanics. Use Unity’s built-in components and APIs to handle physics, collisions, and animations. Continuously test and iterate your mechanics to ensure they are fun and engaging.
Adding Audio and Visual Effects
Enhance the immersion of your game by incorporating audio and visual effects. Add background music, sound effects, and voiceovers to create an immersive auditory experience. Utilize Unity’s particle system to generate eye-catching visual effects such as explosions, sparks, and weather effects. Polish these effects to match the theme and atmosphere of your game.
Adding audio and visual effects to your game in Unity can greatly enhance the overall experience.
How to incorporate audio and visual effects:
Audio Effects
- Importing Audio: Prepare or acquire audio files in formats supported by Unity (such as WAV or MP3). Import them into your Unity project by dragging and dropping them into the project folder;
- Creating an Audio Source: In the Scene view, select the object (e.g., character, environment) to which you want to attach the audio. Add an Audio Source component to that object by clicking on “Add Component” in the Inspector window and searching for “Audio Source”;
- Configuring Audio Source: Customize the Audio Source settings in the Inspector. Adjust properties like the audio clip (the imported audio file), volume, pitch, spatial blend (for 3D audio), and loop (to repeat the audio);
- Triggering Audio: You can trigger audio playback based on specific events or conditions using scripts. For example, you can play sound effects when a character jumps or when an action is performed. Use the AudioSource.Play() method in your scripts to start playing the audio.
Visual Effects
- Particle System: Unity’s Particle System allows you to create various visual effects like explosions, fire, smoke, and more. To add a Particle System, select an object in the Scene view, go to “Add Component” in the Inspector, and search for “Particle System”;
- Configuring Particle System: Customize the Particle System settings to achieve the desired visual effect. Adjust parameters like emission rate, shape, color, size, velocity, and lifetime. Unity provides a wide range of options to create visually stunning effects;
- Scripted Effects: For more complex visual effects, you can use scripts to control and manipulate objects in your game. By modifying object properties (position, scale, rotation) over time, you can create dynamic effects like animations or visual transformations;
- Shaders and Post-processing: Unity’s shader system allows you to create advanced visual effects by manipulating the rendering process. You can write custom shaders or utilize pre-built shaders to achieve specific visual styles. Additionally, Unity’s post-processing stack provides a collection of effects like bloom, depth of field, and color grading to enhance the overall visuals;
- Scripting Animation: Use Unity’s animation system to create animated visual effects. You can animate properties of objects, such as scale, rotation, or color changes, over time. This enables you to create dynamic and interactive visual effects within your game.
User Interface and Menus
Design intuitive and visually appealing user interfaces (UI) and menus to guide players through your game. Create UI elements for displaying health, score, and other essential information. Implement menus for starting a new game, adjusting settings, and accessing in-game achievements. Ensure that the UI is responsive and optimized for different devices and resolutions.
Testing and Debugging
Regular testing is crucial to identify and fix issues within your game. Perform playtesting to evaluate gameplay mechanics, balance difficulty, and identify any bugs or glitches. Utilize Unity’s debugging tools to inspect variables, breakpoints, and error logs. Make adjustments based on feedback and keep refining your game until it delivers a smooth and enjoyable experience.
Optimization and Performance
Optimize your game’s performance to ensure smooth gameplay across different devices. Optimize graphics by reducing the polygon count, utilizing LOD (Level of Detail), and implementing occlusion culling techniques. Compress textures, batch draw calls, and implement object pooling to improve rendering performance. Profile your game to identify bottlenecks and make necessary optimizations.
Publishing Your Game
Congratulations on completing your 3D Unity game! Now it’s time to share your creation with the world. Choose the appropriate platforms (PC, mobile, console) and follow the guidelines for each platform to package and export your game. Create compelling screenshots, videos, and promotional material to attract potential players. Consider releasing your game on digital distribution platforms such as Steam, App Store, or Google Play.
Conclusion
Creating a 3D Unity game requires a combination of creativity, technical skills, and dedication. By following this guide, you have learned the essential steps involved in making a 3D Unity game, from setting up Unity to publishing your creation. Remember to continuously learn, iterate, and have fun throughout the process. Good luck, and may your game bring joy to players around the world!
The post The Ultimate Guide to Creating 3D Games with Unity appeared first on Pad-TheGamers.
]]>The post How to Unpack Prefabs in Unity? appeared first on Pad-TheGamers.
]]>Understanding Prefabs
Prefabs in Unity are preconfigured assets that allow you to create and reuse game objects with consistent properties and behaviors. They serve as templates that can be instantiated multiple times in a scene, providing several benefits throughout the game development process. Here are some key advantages of its use:
- Reusability: Prefabs promote efficient workflow by enabling you to create an object once and reuse it in multiple instances throughout your project. This saves time and effort, as you don’t have to recreate similar objects from scratch;
- Consistency: You can ensure uniformity in design and functionality across your game. Any changes made to the original prefab automatically update all instances, maintaining consistency throughout your project;
- Efficiency in Updates: If you need to make changes to a prefab, those changes will propagate to all instances of that prefab. This allows for easy updates and modifications, reducing the need to manually adjust each individual object;
- Modularity: It enhances flexibility by allowing you to create complex object hierarchies. You can nest prefabs within others, enabling the creation of reusable components and systems that can be easily modified and combined;
- Collaboration: Prefabs facilitate collaboration among team members. Designers, artists, and developers can work on different aspects of the project simultaneously, with changes to prefabs being reflected in real-time, ensuring everyone is working with the latest version;
- Performance Optimization: By using prefabs, you can optimize performance by reducing the number of draw calls and improving memory management. Instances of the same prefab share resources, resulting in more efficient rendering and improved performance;
- Iteration and Prototyping: They are invaluable during the iteration and prototyping phase of game development. They allow you to quickly test different variations and configurations without the need for extensive coding or asset creation.
When to Unpack Prefabs
Unpacking prefabs in Unity is a process that involves breaking the prefab instance connection and converting it into a regular game object with no link to its original prefab. While it offers numerous benefits, there are certain situations where unpacking them becomes necessary. Here are some scenarios when you may consider unpacking prefabs:
Customization
If you need to make specific modifications to a prefab instance that are not intended to be propagated to other instances, unpacking allows you to customize that particular object without affecting the others. This can be useful when you want to create unique variations or fine-tune specific elements of a prefab.
Independent Changes
Unpacking prefabs is beneficial when you want to make changes to a specific instance that should not be synchronized with the original prefab or its other instances. By unpacking, you can freely modify the object without worrying about unintentionally altering other prefabs or instances.
Performance Optimization
In some cases, unpacking prefabs can improve performance. If you have a large number of instances that share the same prefab, Unity’s internal overhead for managing the prefab connections can impact performance. Unpacking the prefabs can reduce this overhead and potentially improve the runtime performance of your game.
Collaboration and Asset Sharing
Unpacking prefabs can simplify collaboration with other team members or when sharing assets with external parties. It ensures that the asset is shared as a standalone game object without any prefab connections, making it easier to integrate into different projects or workflows.
Debugging and Troubleshooting
When encountering issues or bugs specific to a prefab instance, unpacking can aid in the debugging process. By unpacking the prefab, you can isolate the problematic instance and analyze it separately, making it easier to identify and resolve any issues.
Unpacking Prefabs Step-by-Step
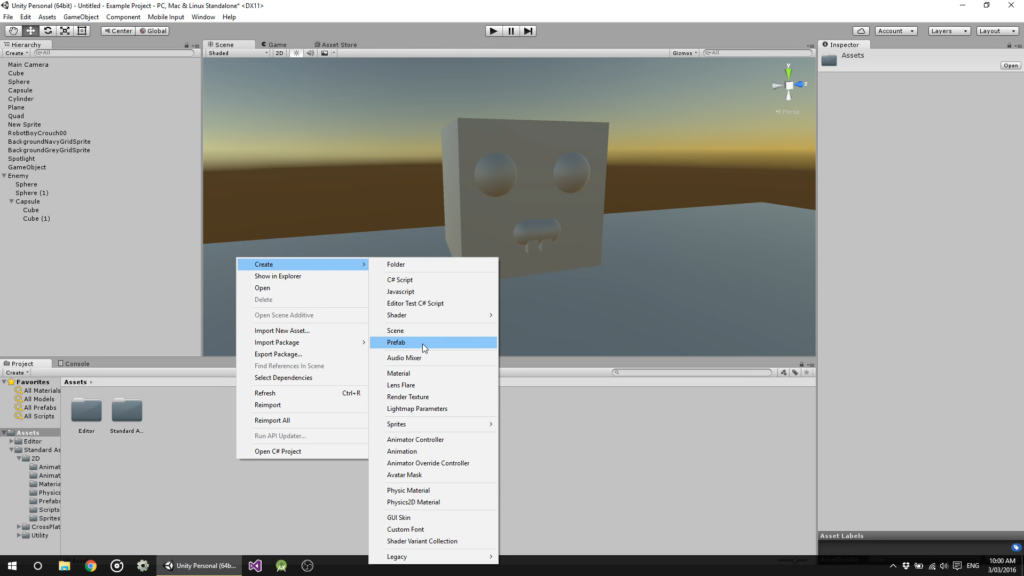
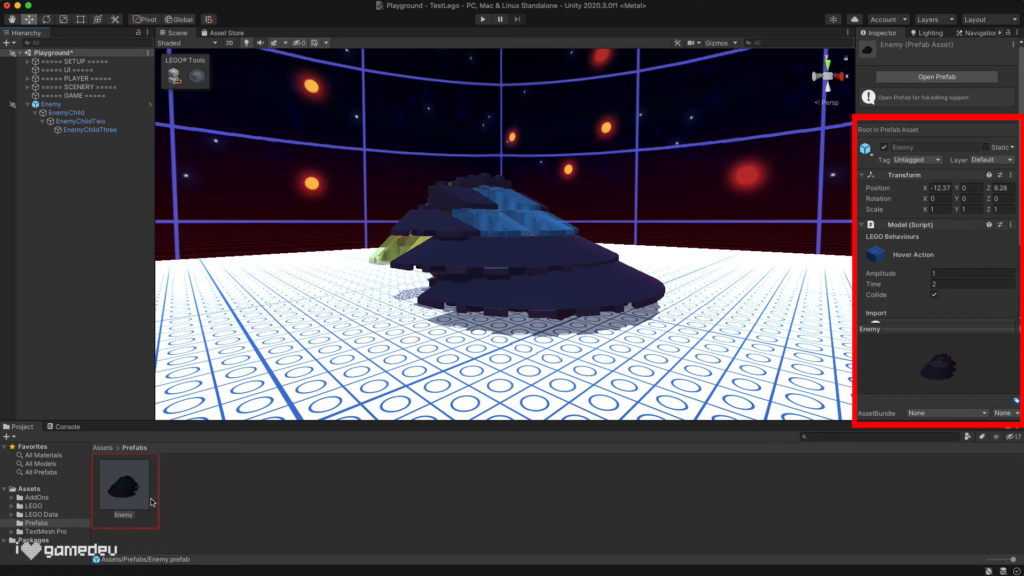
Identifying the prefab instance to unpack: Begin by navigating through the Unity Editor hierarchy to locate the specific prefab instance that you want to unpack. This can be done by expanding the relevant folders and objects within the hierarchy.
- Unpacking the prefab
Once you’ve identified the prefab instance, right-click on it to access the context menu. From the menu, select the “Unpack Prefab” option. This action will initiate the unpacking process, converting the prefab instance into a regular game object.
- Understanding the implications of unpacking
It’s important to comprehend the implications of unpacking. Unpacking creates a unique instance of the prefab, which means that any changes made to this instance will no longer affect other instances linked to the original prefab. This allows for independent modifications and customization.
- Modifying the unpacked prefab instance
With the prefab instance unpacked, you have the freedom to make changes and modifications. This can include adjusting the position, rotation, and scale of the object, as well as tweaking individual components attached to it. Explore the various modification options available to meet your specific needs.
- Managing unpacked prefab instances
As you work with unpacked prefab instances, it’s crucial to establish strategies for organization and tracking. Consider implementing naming conventions, grouping related instances together, or utilizing Unity’s organizational features such as folders and tags. This will help maintain clarity and prevent confusion as you continue to work on your project.
Best Practices and Considerations
When working within Unity, it’s important to follow best practices and consider certain factors to ensure a smooth and efficient development process. Here are some key practices and considerations to keep in mind:
| Practice | Description |
|---|---|
| Modular and Reusable Design | Design prefabs with a modular and reusable approach, enabling easy duplication and reuse in different parts of the project. |
| Organized Hierarchy | Maintain a well-organized hierarchy within prefab instances, grouping related objects and utilizing parent-child relationships for clarity and ease of navigation. |
| Reference Management | Mindfully set up and maintain references within prefabs, avoiding broken references that can lead to runtime errors or unexpected behavior. |
| Variants | Utilize prefab variants to create variations of a base prefab without altering the original, allowing modifications of specific properties or components while maintaining core functionality. |
| Nesting | Consider nesting prefabs to create complex and modular structures, with each nested prefab representing a self-contained unit, promoting organization, reusability, and easier component modifications. |
| Version Control | Include prefabs in version control systems like Git to track changes, collaborate effectively, and manage conflicting changes with ease. |
| Overrides | Understand and utilize prefab overrides to make modifications to specific instances of a prefab without affecting the rest, enabling customization while preserving the core functionality. |
Conclusion
Unpacking prefabs in Unity provides developers with the flexibility and control to tailor specific instances to their unique needs. By following the step-by-step guide in this article, you now have the knowledge and tools to unpack prefabs effectively. Embrace the power of customization and unlock the full potential of your Unity projects with unpacked prefabs.
The post How to Unpack Prefabs in Unity? appeared first on Pad-TheGamers.
]]>The post Discover The Secrets To Obtaining Game Dev Tycoon For Free appeared first on Pad-TheGamers.
]]>The Game Dev Tycoon Experience
Before we delve into the methods of obtaining Game Dev Tycoon for free, let’s take a moment to understand the allure of this captivating game. Developed by Greenheart Games, Game Dev Tycoon provides players with an immersive and realistic experience of running their own game development company. From brainstorming game ideas to managing employees, marketing strategies, and dealing with the challenges of the ever-evolving gaming industry, this simulation game offers endless hours of strategic gameplay.
Legal and Ethical Considerations
While the allure of acquiring Game Dev Tycoon for free is understandable, it is essential to address the legal and ethical considerations surrounding such endeavors. As writers, we strongly encourage our readers to respect the hard work and dedication of game developers by purchasing legitimate copies of the game. Supporting developers ensures their continued ability to create incredible gaming experiences for us all. However, if circumstances prevent you from purchasing the game, we understand the desire to explore alternatives. In this article, we aim to present both legal and ethical approaches to acquiring Game Dev Tycoon for free.
Official Free Trials and Demos
One of the most legitimate ways to experience Game Dev Tycoon without spending any money is through official free trials and demos. Developers occasionally release limited versions of their games to provide a taste of the full experience. By searching the official website or trusted gaming platforms, you might stumble upon a time-limited trial or a demo version of Game Dev Tycoon. These versions often allow you to enjoy a portion of the gameplay, giving you a glimpse into the addictive world of game development.
Community Forums and Giveaways
Community forums and gaming communities can be treasure troves when it comes to finding opportunities to obtain Game Dev Tycoon for free. Game developers, enthusiasts, and even the game’s official social media channels may occasionally organize giveaways or contests where lucky winners receive free copies of the game. Engaging with these communities, actively participating in discussions, and keeping an eye on announcements can significantly increase your chances of securing a free copy of Game Dev Tycoon.
To help you stay ahead, we have compiled a table below listing popular gaming communities and forums where such opportunities may arise:
| Community Name | Website |
|---|---|
| Reddit /r/gaming | www.reddit.com/r/gaming |
| Steam Community Forums | steamcommunity.com/forum |
| Game Dev Tycoon Forum | forum.greenheartgames.com |
| IndieDB Forums | www.indiedb.com/forums |
| Game Jolt Forums | community.gamejolt.com |
Alternative Platforms and Deals
If you are unable to find a free version of Game Dev Tycoon through official trials, demos, or community giveaways, there are alternative platforms and deals to explore. Websites specializing in discounted or free game offerings often surprise users with time-limited promotions, bundles, or special events. By visiting these platforms regularly, you may stumble upon Game Dev Tycoon being offered at a significantly reduced price or even for free.
Here are some notable platforms to consider:
- Steam: The popular gaming platform frequently holds seasonal sales and promotional events where you can find Game Dev Tycoon at a discounted price. Keep an eye on their store page and wishlist the game to receive notifications;
- Epic Games Store: This platform often provides free games to its users. Keep an eye on their weekly free game offerings, as Game Dev Tycoon might become available at no cost during one of these promotions;
- Humble Bundle: Known for its game bundles, Humble Bundle occasionally offers Game Dev Tycoon as part of their packages. By purchasing a bundle that includes the game, you can obtain it at a significantly reduced price.

Conclusion
In conclusion, while acquiring Game Dev Tycoon for free may be tempting, it is crucial to respect the hard work and dedication of game developers by purchasing legitimate copies of the game whenever possible. However, if circumstances prevent you from purchasing the game, there are still avenues to explore, such as official trials, demos, community giveaways, and alternative platforms that offer discounted or free deals. Remember to stay within legal and ethical boundaries while seeking out these opportunities.
We hope this comprehensive guide has provided you with valuable insights and options to explore. Whether you embark on your game development journey through a free trial, a community giveaway, or by taking advantage of a special deal, Game Dev Tycoon promises to be a thrilling experience that will allow you to unleash your creative talents and immerse yourself in the world of game development. Happy gaming!
Note: As an ethical content manager, it is important to emphasize that supporting game developers by purchasing legitimate copies of games ensures their continued ability to create innovative and entertaining experiences for players worldwide.
The post Discover The Secrets To Obtaining Game Dev Tycoon For Free appeared first on Pad-TheGamers.
]]>The post Boost Your Research Points Quickly With These Strategies appeared first on Pad-TheGamers.
]]>Research points are the lifeblood of progress in Game Dev Tycoon, serving as the key to unlocking new technologies, features, and game genres. They open doors to innovative gameplay mechanics, advanced graphics, and cutting-edge capabilities that can elevate your games to extraordinary heights. Efficiently gathering research points not only enhances your gaming experience but also empowers you to create groundbreaking and commercially successful titles.
Whether you’re a seasoned player seeking to refine your skills or a newcomer eager to embark on your first game development adventure, the knowledge and techniques shared in this article will equip you with the tools necessary to maximize your RP count and unlock the game’s hidden potential.
So, grab your virtual notepad, put on your game developer hat, and prepare to delve into the exciting world of Game Dev Tycoon as we unveil the secrets to obtaining research points with speed and efficiency.
Choosing the Right Game Combinations
One of the most critical aspects of accumulating research points quickly in Game Dev Tycoon is selecting the right game combinations. Certain game genres and topics yield more research points than others, allowing you to expedite your progress significantly. Here are some winning combinations to consider:
- Action-RPG: Pairing the Action genre with RPG (Role-Playing Game) topic is a potent combination that consistently yields substantial research points. Develop games like “Sword Warrior” or “Magic Chronicles” to maximize your RP gains;
- Simulation-Education: Combining the Simulation genre with the Education topic can be a lucrative choice. Crafting educational simulations such as “Space Academy” or “Eco Tycoon” will not only educate your virtual gamers but also boost your RP accumulation;
- Strategy-Fantasy: Marrying the Strategy genre with Fantasy topic opens the door to research points. Develop games like “Warlords of Magic” or “Kingdom Conquest” to tap into the potential of this combination;
- Adventure-Dungeon: The Adventure genre paired with the Dungeon topic can yield impressive RP gains. Design games like “Cursed Catacombs” or “Mystic Labyrinth” to embark on thrilling adventures and accumulate research points along the way.
By strategically selecting the right combinations, you can optimize your RP accumulation and propel your game development career to new heights.
Staff Management and Training
In the dynamic world of Game Dev Tycoon, the success of your game development studio hinges on the effective management and training of your staff members. These talented individuals possess the skills and expertise necessary to propel your research point acquisition rate to new heights. By implementing sound strategies in staff management and training, you can optimize your team’s performance and unleash their full potential. Here are some key factors to consider:
- Hire Talented Researchers:
When assembling your team, prioritize the recruitment of skilled researchers. During the hiring process, carefully assess candidates’ research skill levels to ensure a more efficient research point generation. Look for applicants with high research skill ratings and consider their compatibility with your studio’s needs and goals. Remember that talented researchers can significantly contribute to the speed and quality of your research endeavors.
- Train Researchers:
Investing in the continuous training and development of your researchers is essential for maximizing their potential and increasing research point generation. Regularly allocate resources to training programs that enhance their skills, focusing on options that specifically boost research points. Training programs such as “Advanced Research Techniques” or “Data Analysis Mastery” provide valuable knowledge and expertise, enabling your researchers to uncover new discoveries and unlock more research points with each project.
- Upgrade Research Lab:
Your research lab serves as the epicenter of your innovation and research efforts. Upgrading this facility not only unlocks new features and possibilities but also boosts research point generation. Allocate resources to improve the research lab’s infrastructure, including research speed, storage capacity, and capabilities. Enhancing these aspects enables your team to conduct research more swiftly and efficiently, leading to a higher accumulation of research points over time.
- Optimize Workflows:
Streamlining the production process and optimizing workflows are essential for maximizing research point output. Assign tasks to your researchers in a way that aligns with their expertise and strengths. Matching the right people to the right tasks ensures that research is conducted effectively and efficiently. Additionally, minimize bottlenecks and communication gaps within your team by fostering a collaborative and organized work environment. Implement project management systems, establish clear roles and responsibilities, and encourage effective communication among team members. By optimizing workflows, you can eliminate unnecessary delays and obstacles, allowing for a smooth and streamlined research process that leads to increased research point gains.
- Foster a Positive Work Environment:
Creating a positive work environment is paramount to the success and motivation of your team members. Encourage a culture of creativity, collaboration, and growth within your studio. Recognize and reward exceptional performance, provide constructive feedback, and offer opportunities for career advancement and personal development. A motivated and engaged team is more likely to generate innovative ideas, work efficiently, and achieve exceptional results, including the accumulation of research points.
By effectively managing and training your staff, upgrading your research lab, optimizing workflows, and fostering a positive work environment, you can unlock the full potential of your team and significantly enhance your research point acquisition rate in Game Dev Tycoon. Remember, your staff members are the driving force behind your studio’s success, and by investing in their growth and nurturing their talents, you pave the way for unparalleled achievements in the game development industry.

Targeted Marketing and Publishing Deals
Strategic marketing and publishing deals can be game-changers in accelerating your research point acquisition. Here’s how you can make the most of these opportunities:
- Marketing Campaigns: Launch targeted marketing campaigns to promote your games. By allocating a higher budget to advertising and marketing, you can generate more hype around your releases, leading to increased game sales and, subsequently, more research points;
- Platform Compatibility: Research and select platforms that are popular among your target audience. Releasing games on compatible platforms increases their sales potential, resulting in higher research point gains;
- Publishing Deals: Negotiating publishing deals can provide valuable resources and marketing support. Partnering with a publisher not only enhances your game’s visibility but also increases the likelihood of earning more research points through successful sales;
- Game Reviews and Awards: Positive reviews and winning prestigious awards generate buzz and attract more players to your games. Invest in improving your game quality and strive for high review scores and awards, as this will boost sales and, in turn, contribute to your research point accumulation.
Game Genre and Topic Combinations
| Game Genre | Topic |
|---|---|
| Action | RPG |
| Simulation | Education |
| Strategy | Fantasy |
Conclusion
In the vast and competitive realm of Game Dev Tycoon, the efficient acquisition of research points serves as the cornerstone for unlocking new technologies, expanding your game development options, and ultimately attaining remarkable success. By diligently implementing the strategies and techniques outlined in this article, you will gain a significant advantage in accumulating research points at an accelerated pace, allowing you to propel your virtual game development empire to unprecedented heights.
The key to success lies in the careful selection of game genre and topic combinations. By focusing on genres like Action-RPG, Simulation-Education, Strategy-Fantasy, and Adventure-Dungeon, you tap into lucrative RP opportunities that can greatly boost your progress. Furthermore, prioritizing staff management and training is vital. Hire talented researchers, invest in their skill development, and upgrade your research lab to maximize RP generation.
To further optimize your research point accumulation, seize the power of targeted marketing campaigns and publishing deals. Strategic advertising, platform compatibility, and partnering with publishers can exponentially increase game sales, leading to a substantial influx of research points.
As you navigate the intricacies of Game Dev Tycoon, always remember that success is a delicate balance of creativity, strategy, and resource management. Adapt the techniques provided in this article to suit your unique play style and embrace the challenges that come your way. Continually iterate on your game development strategies, hone your skills, and enjoy the exhilarating journey of becoming a renowned game development tycoon.
The post Boost Your Research Points Quickly With These Strategies appeared first on Pad-TheGamers.
]]>The post Gameplay with Cinemachine: Make the Camera Follow the Player appeared first on Pad-TheGamers.
]]>One of the standout features of Cinemachine is its versatility. It provides developers with a wide range of controls and options to customize camera behavior according to their specific needs. Whether you’re working on a first-person shooter, a platformer, or an open-world adventure, Cinemachine has the tools to make your camera truly shine. By integrating Cinemachine into your project, you gain access to advanced functionalities such as dynamic camera tracking, smooth transitions, and intelligent framing. These features allow you to create seamless camera movements that adapt to the player’s actions, resulting in a more immersive and cinematic experience.
Furthermore, Cinemachine simplifies the camera creation process. You can easily enhance existing cameras by adding Cinemachine components and fine-tuning their properties, or you can start from scratch and build entirely new cameras with unique behaviors. This flexibility empowers developers to push the boundaries of what is possible in terms of camera design and functionality.
Another advantage of using Cinemachine is its seamless integration with other Unity features and assets. Whether you’re working with animation systems, physics simulations, or audio tools, Cinemachine seamlessly integrates with these components, allowing for a cohesive and streamlined development process. Cinemachine is a game-changer for camera development in Unity. Its powerful and versatile suite of tools opens up a world of possibilities for developers, enabling them to create visually stunning and immersive experiences. Whether you’re a seasoned developer or just starting out, Cinemachine is a valuable asset that will take your camera work to the next level.
In this particular demo, we will focus on utilizing Cinemachine for player-following cameras. While Cinemachine offers a wide range of capabilities for various purposes, we will specifically explore how it can be used to create a seamless and immersive player-following camera experience.
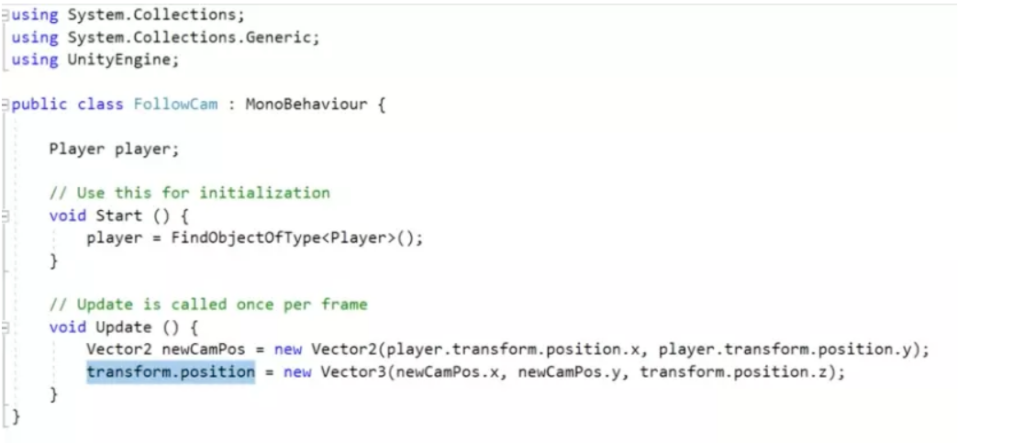
In many cases, developers who are unfamiliar with Cinemachine tend to rely on outdated methods to make the camera follow the player, as depicted in the image above.
Creating a Follow Camera Using Cinemachine
Creating a follow camera using Cinemachine is a game development technique that adds a dynamic and engaging perspective to your project. By implementing Cinemachine, you can achieve smooth and intuitive camera movement that follows the player’s actions seamlessly. This technique is particularly useful in various game genres such as platformers, adventure games, and even first-person shooters.
With Cinemachine, you have the flexibility to define how the camera behaves and interacts with the player. You can set parameters such as damping, dead zones, and follow speed to create a personalized camera experience. The camera will smoothly track the player’s movements, keeping them in focus and providing a clear view of the game world.
One of the major advantages of using Cinemachine for a follow camera is its modularity and ease of use. Cinemachine provides a wide range of tools and components that can be easily integrated into your existing camera system or used to create new cameras from scratch. You can organize your cameras within a dedicated game object, making it easier to manage and control multiple cameras in your scene. Cinemachine offers advanced features like virtual cameras and camera blending, allowing for seamless transitions between different camera perspectives. This adds depth and cinematic flair to your game, enhancing the overall player experience.
Implementing a follow camera using Cinemachine not only improves gameplay but also adds a professional touch to your project. It provides the level of control and polish typically seen in AAA games, elevating the overall quality of your game.
Before diving into the process, make sure to follow these initial steps:
- Create a new empty project in your preferred development environment.
- Set the aspect ratio of the game view to 16:9 for optimal display.
- Download the project files from the provided link (https://github.com/Brackeys/2D-Shooting) and import them into your current project.
- Locate the scene file with the name “main” and open it.
- Visit the asset store and import the Cinemachine package into your project to gain access to its functionality and features.
Step 1: Adding the “Cinemachine Brain” Script to the Main Camera
Locate the Main Camera in the hierarchy panel.
In the Inspector panel, click on the “Add Component” button.
Type “Cinemachine Brain” in the search bar and select it to add the Cinemachine Brain script to the Main Camera.
Step 2: Creating an Empty Game Object for Camera Organization
Create a new empty game object to serve as a container for your cameras.
Name this game object “cameras” for clarity.
Reset the transform of the “cameras” game object to its default position and rotation.
Drag the Main Camera and place it as a child of the “cameras” game object. This helps in organizing the cameras in your scene.
Step 3: Creating a Cinemachine 2D Camera
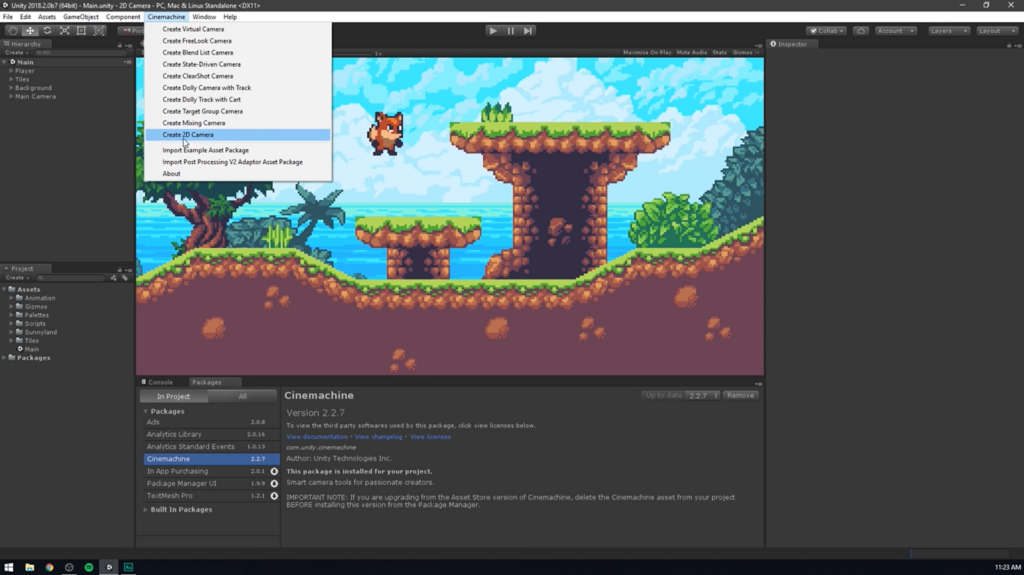
Go to the Cinemachine menu and select “Create 2D Camera.”
This action will create a new object named “CM vcam1” in the hierarchy, representing the Cinemachine virtual camera.
Step 4: Assigning the Parent Game Object to the Cinemachine Camera
Under the “cameras” game object in the hierarchy, drag and place the “CM vcam1” object.
Step 5: Setting the Follow Target for the Follow Camera
Drag the player object from the hierarchy and drop it onto the “CM vcam1” object.
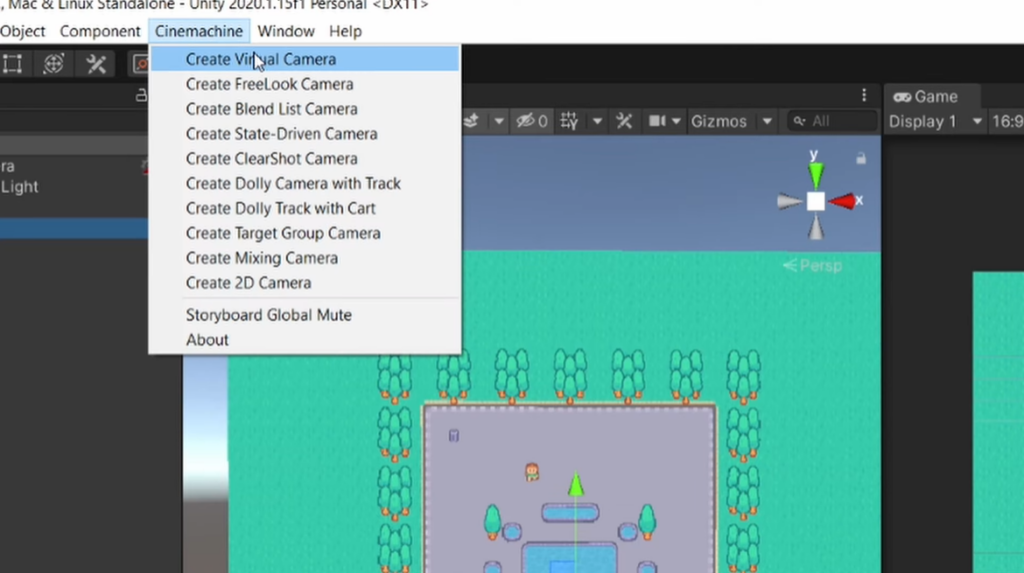
Specifically, assign the player object to the “Follow” property of the Cinemachine Virtual Camera component, which is nested under the “CM vcam1” object.
Step 6: Important Notes
Now that our camera follower is partially ready, there are a few important things to note:
The camera has a limited field of view, indicated by the blue portion in the image below. Anything outside this area will not be visible to the camera.
The red portion indicates areas that the camera cannot view at all.
In your project, you will notice a yellow dot (middle reference point) indicating where the camera is currently looking.
The rectangular space created by four white arrows (as highlighted in the image below) represents the dead zone. If the player character stays within this zone, the camera will not move. It’s only when the player reaches the edge of the dead zone that the camera begins to follow.
Step 7: Setting the Camera Properties
Ensure that you have selected the “Framing Transposer” option. If not, you may not see all the available properties.
Step 8: Observing the Effect of Property Changes on the Player
Experiment with changing the values of properties such as X damping, Y damping, Dead Zone Width, and Dead Zone Height to zero.
As you make these changes, you will notice that the camera becomes locked directly onto the player, which may be suitable for certain types of games.
Running the scene at this point may feel jarring, especially during jumps, as the camera follows the player too closely.
To address this, gradually increase the X and Y damping values and adjust the Dead Zone Width.
By fine-tuning these parameters, you can achieve a smoother camera follow effect. Play around with the settings to find the desired balance between player movement and camera responsiveness.
Conclusion
Using Cinemachine, you have the ability to create smooth and dynamic camera movements, allowing for a more immersive and engaging player experience. The flexibility and versatility of Cinemachine enable you to customize and fine-tune the camera behavior to suit the specific requirements of your game.
By implementing a follow camera, you can ensure that the player’s movements are accurately tracked and that the camera seamlessly follows their actions, providing a clear view of the game world. This enhances the player’s spatial awareness and immersion, resulting in a more enjoyable and immersive gameplay experience.
Incorporating a follow camera using Cinemachine is a valuable addition to your game development toolkit. It offers the potential to elevate the overall quality and professionalism of your game, providing a polished and visually appealing experience for players.
Now that you have gained a solid understanding of the steps involved in creating a follow camera using Cinemachine, you can confidently integrate this feature into your game development projects. Embrace the power of Cinemachine and unleash the full potential of your games with captivating camera movements and immersive player experiences.
The post Gameplay with Cinemachine: Make the Camera Follow the Player appeared first on Pad-TheGamers.
]]>The post Creating a Successful VR Game: Tips and Strategies appeared first on Pad-TheGamers.
]]>To delve into the fundamentals and discover the best practices of VR game development, this article serves as your comprehensive guide. Get ready to explore the essentials and unlock the secrets to crafting an exceptional virtual reality experience.
Step-by-Step Guide to Building VR Games Effectively
Are you eager to learn the process of creating VR games that stay within budget and meet audience needs? This comprehensive article provides a step-by-step workflow to help you efficiently organize your VR game development process.
From Concept to Creation
Before diving into the development phase, thorough preparation is essential to save time and resources. Here’s a checklist of crucial steps to take:
- Generate a unique idea: Collaborate with the product owner and marketing specialists to analyze the VR gaming market and develop a concept that sets your game apart from competitors.
- Choose the platform: Research the most prevalent virtual reality headset among users to maximize your game’s potential player base. Careful analysis, such as considering sales data, can guide you in making an informed decision.
- Assemble a talented team: It’s crucial to have experienced professionals on board to avoid launch delays and costly mistake fixes. Consider options like outsourcing or hiring foreign experts with competitive rates to optimize your team composition.
- Create a game design document (GDD): Outline technical requirements, game logic, and visual concepts in a detailed GDD. This document serves as a roadmap for your developers, ensuring a cohesive and expected outcome.
- Develop a test design document: Testers should prepare a comprehensive strategy for quality control. This document includes technical information and testing tasks, enabling efficient testing once the initial code unit is ready.

By following this organized workflow, you can lay a solid foundation for your VR game development journey, setting yourself up for success in both meeting audience expectations and staying within your budget constraints.
Building a VR Game: From Theory to Action
Now that you have a solid grasp of the theoretical aspects of VR game creation, it’s time to translate that knowledge into practical application. The production phase is where your team will bring your game to life, and the workflow may vary depending on the chosen tech stack. Unity and Unreal Engine (UE) are two popular game engines commonly utilized for VR game development, each with its own unique strengths.
If your goal is to create a VR game as a mobile application, Unity is a suitable choice. It offers a robust set of tools and is widely used for developing virtual reality experiences on mobile platforms. On the other hand, Unreal Engine is renowned for its exceptional visual quality and is often preferred for creating VR games on consoles and desktop platforms.
Regardless of the game engine chosen, the key stages of building a VR game remain similar to any software development process. 3D modeling artists will create the visual content, including environments, characters, and props, and animate them to meet the game’s requirements. Both Unity and Unreal Engine provide marketplaces with a wide selection of pre-made assets, enabling you to customize and integrate them seamlessly into your game.
Following that, the back-end work commences, where the visuals and actions are combined according to the script and translated into code. Game engines like Unity and UE offer various tools and software development kits (SDKs) to simplify the creation of a rich and immersive VR environment. Thorough testing is crucial, employing unit testing methods, to identify and rectify any bugs or issues present in the code.
The Testing Process in VR Game Development
Once developers have confidence in their code, testers come into action with their arsenal of testing techniques and tools to thoroughly assess the functionality and durability of the game across various scenarios. When it comes to testing VR games, specialists meticulously search for bugs and unexpected behavior that may arise during user interaction, providing valuable feedback to developers for necessary fixes.
After rigorous testing and ensuring a game’s impeccable functionality and user experience, it is finally ready to be launched in the market. However, the development team’s journey is far from over. The relentless pursuit of excellence continues as developers constantly strive to enhance the product and maintain its high quality. New features are introduced, while testers diligently perform regression testing to ensure that modifications to individual units do not compromise the overall stability and integrity of the code.
5 Key Best Practices for Building VR Games
It is a well-known fact that every process has its most effective approaches. Typically, gaining knowledge about helpful specifics is a result of experience, involving numerous mistakes that lead to discovering optimal solutions for specific tasks.
Fortunately, in the age of the internet, one can save valuable time by not having to independently master game development, as many experts generously share their knowledge for free. Consequently, the experts at Game-Ace have identified the top five tips for aspiring VR game developers and more.
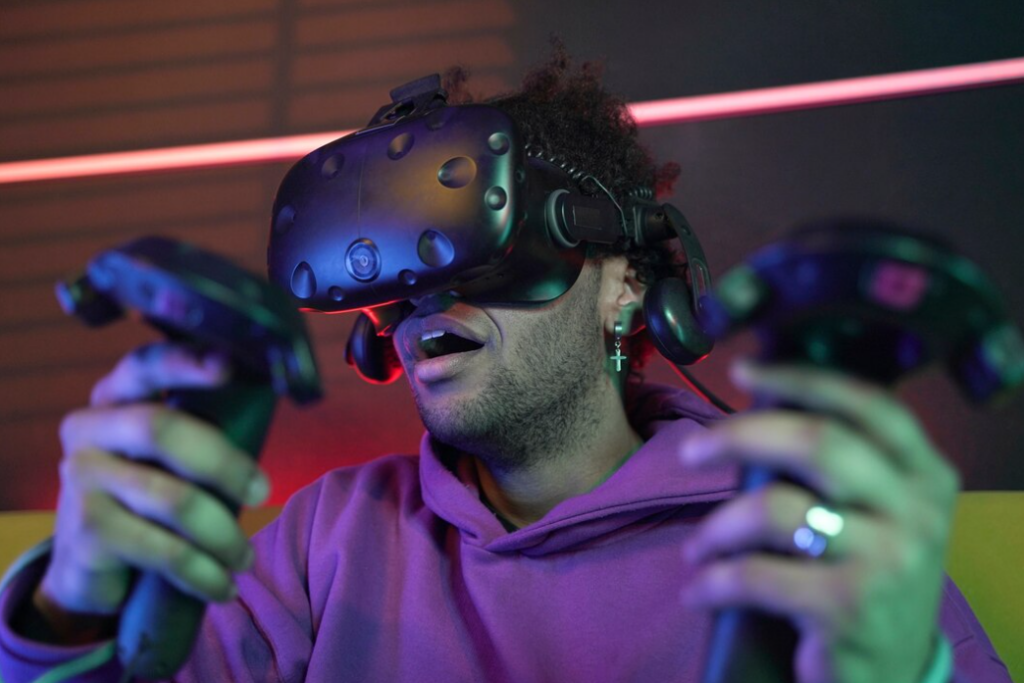
- Prioritize a high level of interactivity. While it may seem like common sense, VR games require a particular emphasis on interactivity. Since VR technology aims to provide an unparalleled experience, gamers should feel fully immersed in a realistic world where objects that appear interactive actually behave as such.
- Account for VR limitations. It’s fantastic to have brilliant ideas for a VR project, but it’s essential to ensure they align with the capabilities of virtual reality. Put simply, mechanics and gameplay that work well for desktop games may not be suitable for VR headsets.
- Avoid overly complex level designs. Navigating a fully immersive and unfamiliar environment can be more challenging than in a PC, mobile, or console game. Some users may experience anxiety if they can’t discern what they need to do or where to go next. Therefore, it’s advisable to create levels that are less intricate than AAA games and provide additional hints for potentially confusing sections.
- Implement positional audio. Positional audio is a crucial element wherein sounds originate from their intended sources. Adjust the audio in a way that corresponds to the player’s distance and position relative to the sound object, enhancing immersion and creating a more realistic impression.
- Conduct thorough real-life testing. VR games engage most of the human senses, making it vital to test the game using an actual headset. Evaluate not only the gaming user experience but also the user’s physical well-being. If a tester experiences motion sickness after only 10 minutes of gameplay, it indicates a problem that needs fixing, whether it’s related to camera settings or mechanics.
VR Game Development Process: Insights from Professionals
When it comes to VR game development, partnering with a professional company that offers outsourcing or outstaffing services can be a valuable solution, especially if you’re new to the field or lack the necessary resources to efficiently organize your process. This approach brings several benefits, including:
- No recruitment hassle: By collaborating with a specialized company, you can skip the recruitment process and gain access to a team of pre-vetted specialists who are already employed by the outsourcing company.
- Access to hardware and software: Outsourcing companies have all the essential hardware and software required for efficient VR game development. This saves you the time and effort of acquiring and setting up the necessary equipment yourself.
- Cost savings: Opting for outsourcing can result in significant cost savings. You can avoid expenses such as full-time salaries, paid time off, employee benefits, office rent, and training for in-house employees. Outsourcing allows you to tap into the expertise of professionals without the financial commitment of a full-time team.
If you’re looking for a reliable partner to alleviate the burdens of VR development, Game-Ace is an excellent choice. With 17 years of experience, we are a professional and innovative game creation studio. Our expertise lies in Unity and Unreal Engine, and we specialize in designing next-generation VR games that offer players an exceptional gaming experience.
FAQ
Q: How much does it cost to build a VR game?
A: The development time and cost of a VR app or game can vary depending on its complexity. For simpler VR experiences, such as basic games or apps, it can take around one to two months to develop, with costs starting at around $20,000. On the other hand, VR projects of medium complexity, such as creating an online store with VR capabilities, may require up to six months of development time and have costs starting from $30,000. It’s important to note that these are general estimates, and the actual time and cost can vary based on the specific requirements and features of the VR project.
Q: What code is used to make VR games?
A: VR games can be developed using various programming languages and game engines. Commonly used languages for VR game development include C# for Unity, C++ for Unreal Engine, and JavaScript for web-based VR experiences. These languages provide the necessary tools and frameworks to create immersive and interactive VR gameplay mechanics.
Q: Can you make a VR game without coding?
A: While coding skills are typically beneficial for developing VR games, it is possible to create VR experiences without extensive coding knowledge. Game engines like Unity and Unreal Engine offer visual scripting tools that allow users to create VR games using a node-based system. These visual scripting tools provide a more intuitive interface where users can drag and drop pre-built components and scripts to create interactions, animations, and gameplay mechanics. However, for more complex and customized VR experiences, some level of coding may still be required.
Q: How long does it take to code a VR game?
A: The development timeline for a VR training program typically ranges from 8 to 10 weeks, although it can vary depending on the project. Some projects can be completed in as little as 4 weeks, while others may take as long as 6 months or more. The development time for VR content is influenced by several factors, including the creation of the flowchart and script. These initial stages are crucial for outlining the desired user experience and setting the foundation for development.
The post Creating a Successful VR Game: Tips and Strategies appeared first on Pad-TheGamers.
]]>The post Harnessing Interactivity for Dynamic Game Development appeared first on Pad-TheGamers.
]]>EventTrigger is a powerful component in Unity that allows developers to intercept and respond to various events triggered by user interactions. In this article, we will delve into the fundamentals of EventTrigger components, exploring their capabilities, usage, and the different types of events they can handle. By the end, you will have a solid understanding of how EventTrigger works and how you can leverage its functionality to create immersive and interactive experiences in your Unity projects.
The EventTrigger component in Unity serves as a receiver for events from the EventSystem, enabling the triggering of registered functions based on specific events. With EventTrigger, you have the flexibility to assign multiple events and determine their execution order. This powerful functionality allows you to precisely specify the functions to be called for each event, facilitating intricate event-driven interactions within your project.
There are various event types in Unity that can be intercepted using EventTrigger:
- PointerEnter: Called when the mouse pointer is over the Game Object.
- PointerDown: Triggered when a pointer button is pressed.
- PointerUp: Triggered when a pointer button is released.
- PointerExit: Called when the mouse pointer exits the Game Object.
- PointerClick: Triggered when a pointer button is clicked.
- Drag: Invoked when a drag is being performed.
- Drop: Called when an object is dropped during a drag-and-drop operation.
- Scroll: Triggered when the mouse scroll wheel is scrolled.
- BeginDrag: Called at the start of a drag operation.
- EndDrag: Triggered at the end of a drag operation.
- Initialized Potential Drag: Invoked when a potential drag is initialized.
- Deselect: Called when the Game Object is deselected.
- Select: Triggered when the Game Object is selected.
- Submit: Invoked when a form is submitted.
1.1 PointerEnter Event
The PointerEnter event is triggered when the mouse pointer hovers over a Game Object. It serves as a powerful trigger in Unity, activating when the mouse pointer gracefully glides over a Game Object. This event opens up a world of possibilities, allowing developers to seamlessly introduce dynamic responses and interactions based on the user’s hovering behavior. Whether it’s highlighting interactive elements, providing tooltips, or initiating contextual actions, harnessing the PointerEnter event empowers developers to create immersive and intuitive user experiences that captivate and engage players. Embrace the potential of the PointerEnter event and bring your Unity projects to life with enhanced interactivity and user engagement.
Demonstration:
- Add an Image component to the scene. Right-click in the property window, select UI, and choose Image.
- Select the Image and click on “Add Component” in the Inspector window.
- Search for “Event Trigger” and select it from the options in the property window.
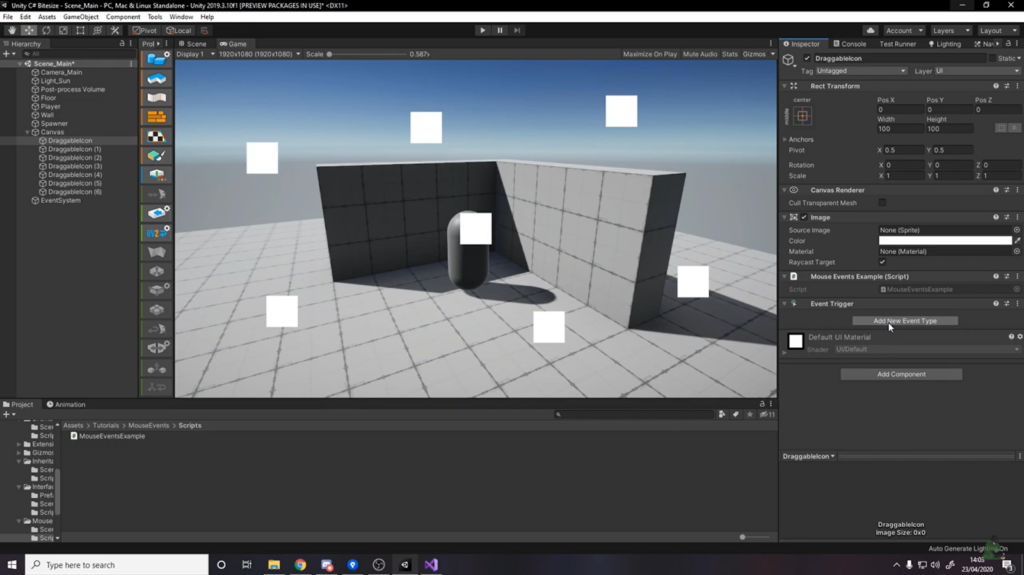
- Click on “Add New Event Type” in the Event Trigger component.
- Choose the PointerEnter event from the dropdown menu.
- Now, the setup should resemble the provided image.
- Create a script and attach it to a game object. The setup should resemble the provided image.
- Copy the script below into the “TextInput” function.
- Select the Image and click on the “+” icon to add an event.
- Drag the “Text Input script” from the Hierarchy window to the PointerEnter event.
- Select onPointerClickEventTrigger() function from PointerEnter Event.
- Now Run the project. When your pointer is above image the function is called.
1.2 PointerDown Event
The PointerDown event is triggered when the mouse button is pressed down on the Game Object.
Demonstration:
- Add an Image component to the scene. Right-click in the property window, select UI, and choose Image.
- Select the Image and click on “Add Component” in the Inspector window.
- Search for “Event Trigger” and select it from the options in the property window.
- Click on “Add New Event Type” in the Event Trigger component.
- Choose the PointerDown event from the dropdown menu.
- Now, the setup should resemble the provided image.
- Create a script and attach it to a game object. The setup should resemble the provided image.
- Copy the script below into the “TextInput” function.
| using System.Collections; | |
| using System.Collections.Generic; | |
| using UnityEngine; | |
| using UnityEngine.UI; | |
| public class textInput : MonoBehaviour | |
| { | |
| //this function is called When a dropdown item is selected. | |
| public void onPointerEnterEventTrigger() | |
| { | |
| print(“Pointer Enter Event Call……”); | |
| } | |
| } |
- Select the Image and click on the “+” icon to add an event.
- Drag the “Text Input script” from the Hierarchy window to the PointerDown event.
- Select the onPointerDownEventTrigger() function from the Event.
- Run the project. The function will be called when the mouse button is pressed down on the Image.
1.3 PointerUp Event
The PointerUp event is triggered when the mouse button is released from the Game Object.
Demonstration:
- Add an Image component to the scene. Right-click in the property window, select UI, and choose Image.
- Select the Image and click on “Add Component” in the Inspector window.
- Search for “Event Trigger” and select it from the options in the property window.
- Click on “Add New Event Type” in the Event Trigger component.
- Choose the PointerUp event from the dropdown menu.
- Now, the setup should resemble the provided image.
- Create a script and attach it to a game object. The setup should resemble the provided image.
- Copy the script below into the “TextInput” function.
| using System.Collections; | |
| using System.Collections.Generic; | |
| using UnityEngine; | |
| using UnityEngine.UI; | |
| public class textInput : MonoBehaviour | |
| { | |
| public void onPointerDownEventTrigger() | |
| { | |
| print(“Pointer Drag Event Call……”); | |
| } | |
| } |
- Select the Image and click on the “+” icon to add an event.
- Drag the “Text Input script” from the Hierarchy window to the PointerUp event.
- Select the onPointerUpEventTrigger() function from the Event.
- Run the project. The function will be called when the mouse button is released from the Image.
1.4 PointerExit Event
The PointerExit event is triggered when the mouse pointer exits from the Game Object.
Demonstration:
- Select the Image in the Unity editor.
- Click on “Add Component” in the Inspector window.
- Search for “Event Trigger” and select it from the options in the property window.
- Click on “Add New Event Type” in the Event Trigger component.
- Choose the PointerExit event from the dropdown menu.
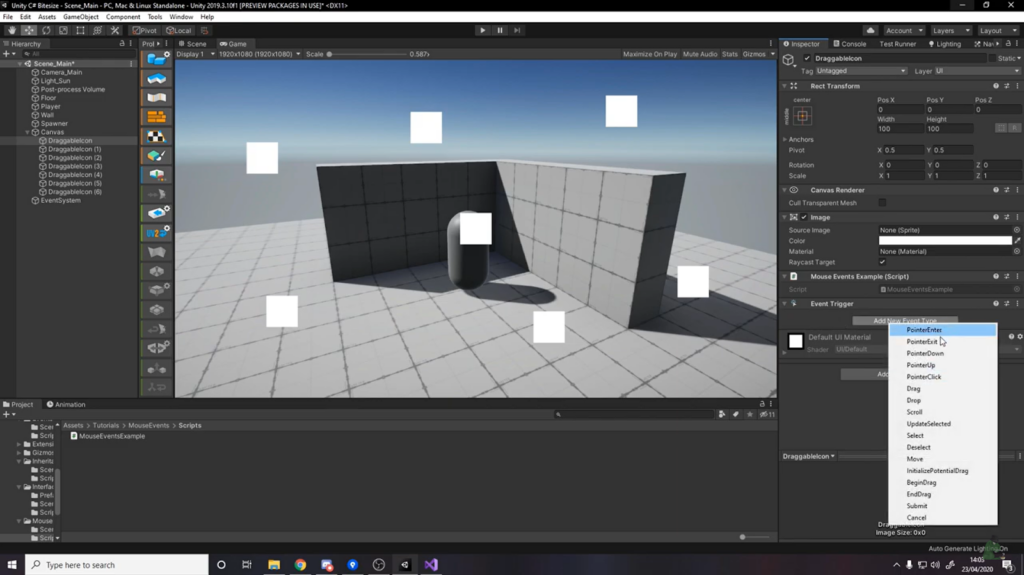
- Now, the setup should resemble the provided image.
- Create a script and attach it to a game object. The setup should resemble the provided image.
- Copy the script below into the “TextInput” function
| using System.Collections; | |
| using System.Collections.Generic; | |
| using UnityEngine; | |
| using UnityEngine.UI; | |
| public class textInput : MonoBehaviour | |
| { | |
| public void onPointerUpEventTrigger() | |
| { | |
| print(“Pointer Enter Event Call……”); | |
| } | |
| } |
- Select the Image and click on the “+” icon to add an event.
- Drag the “Text Input script” from the Hierarchy window to the PointerExit event.
- Select the onPointerExitEventTrigger() function from the Event.
- Run the project. The function will be called when the mouse pointer exits from the Image.
1.5 PointerClick Event
The PointerClick event is triggered when the mouse button is clicked on the Game Object.
Demonstration:
- Add an Image component to the scene. Right-click in the property window, select UI, and choose Image.
- Select the Image and click on “Add Component” in the Inspector window.
- Search for “Event Trigger” and select it from the options in the property window.
- Click on “Add New Event Type” in the Event Trigger component.
- Choose the PointerClick event from the dropdown menu.
- Now, the setup should resemble the provided image.
- Create a script and attach it to a game object. The setup should resemble the provided image.
- Copy the script below into the “TextInput” function.
| using System.Collections; | |
| using System.Collections.Generic; | |
| using UnityEngine; | |
| using UnityEngine.UI; | |
| public class textInput : MonoBehaviour | |
| { | |
| public void onPointerExitEventTrigger() | |
| { | |
| print(“Pointer Exit Event Call……”); | |
| } | |
| } |
- Select the Image and click on the “+” icon to add an event.
- Drag the “Text Input script” from the Hierarchy window to the PointerClick event.
- Select the onPointerClickEventTrigger() function from the Event.
- Run the project. The function will be called when the mouse button is clicked on the Image.
Conclusion
By gaining a comprehensive understanding of the EventTrigger component in Unity and harnessing its capabilities, you are equipped with the knowledge to craft captivating and interactive user experiences within your Unity projects. The capacity to effectively respond to diverse user events opens up a vast realm of possibilities, enabling you to create immersive gameplay mechanics, seamless UI interactions, and captivating user interfaces. Embrace the power of EventTrigger, venture into its array of features, and unlock the boundless potential of interactive design, propelling your Unity creations to new heights.
Embark on a comprehensive, step-by-step journey through Event Triggers, an essential component in Unity. Unlock a deep understanding of the various types of Event Triggers and their practical applications. Implement this knowledge in your business projects to elevate their impact and success.
The post Harnessing Interactivity for Dynamic Game Development appeared first on Pad-TheGamers.
]]>The post Artistic Choices in Video Game Visuals appeared first on Pad-TheGamers.
]]>It’s important to recognize that art and game mechanics are intertwined. While impressive graphics alone cannot rescue a game plagued by poor gameplay, exceptional gameplay cannot carry a game to success without high-quality visuals. Graphics serve as the primary visual medium through which the essence of the gameplay is conveyed to players. Consequently, choosing the appropriate game art style becomes crucial in ensuring players perceive and connect with the game in the desired manner.
The World of Visual Aesthetics in Video Games
A game art style is the seamless integration of all visual elements within a game, meticulously crafted to evoke the desired atmosphere for players. Ideally, every aspect should align harmoniously. However, it is not uncommon to encounter instances where there is a disconnect or indecisiveness between the visual style and the essence of the game. This discrepancy does not necessarily reflect poor execution by the game development team; rather, it may stem from ambitious ideas surpassing the available resources. It is essential to always consider the resources at your disposal before contemplating the game art style.
Creating artistic resources for games demands a significant investment of time and expertise. Whether you are embarking on a solo game development journey or collaborating with an indie team, it is crucial to evaluate the art style that you can effectively handle and manage.
Encountering Extremes
In this scenario, we are presented with two choices:
“I aim to emulate [a popular and successful game], but with my own unique twist.”
“I aspire to develop a completely original and groundbreaking game art style.”
While the first option may seem less audacious than the second, both options are bound to lead to failure. In the first case, you rely on the “crutches” of others’ creative ideas to adorn your gameplay mechanics. In the second case, you disregard the importance of solid mechanics and instead rely solely on the visual innovation’s striking impact. The fundamental issue lies in the inherent inconsistency and fragmentation of these approaches.
A truly exceptional game is not merely a mishmash of intriguing mechanics and groundbreaking visual concepts. The finest games exhibit flawless cohesiveness, providing players with a seamless and harmonious gaming experience. Every aspect is intricately integrated, making it impossible to separate and dissect the components without disrupting the overall brilliance.

The solution lies in aligning both the mechanics and the game art style with the central idea. It is essential to perceive the game as a unified entity and consistently deliver the intended experience to the players. By comprehending the interconnection and interaction of all elements within the game, you can organically arrive at the desired game art style without resorting to copying or pursuing an empty visual spectacle.
Breaking Free from Subjectivism’s Chains
The pervasive influence of subjectivism brings forth an unfortunate reality where what appears meaningful to you may be incomprehensible to others. This pervasive subjectivity casts a shadow over your ideas and comes with its own set of challenges.
If you find yourself grappling with questions like:
“Will players perceive my idea as intended?”
“Does my chosen game art style effectively communicate?”
Escaping this addictive swamp can prove to be quite daunting. It is important to acknowledge that matters are not always black and white, and it is impossible to consider every objective and subjective factor. However, you can strive to blend established design and testing methodologies with more advanced research on your target audience’s understanding of aesthetics and entertainment. By incorporating these approaches, you can navigate this complex landscape more effectively.
The solution lies in maintaining a clear understanding of your objectives and target audience. While your game may not cater to every player on the planet, it should instantly resonate with those for whom it is intended. Cultivating empathy becomes crucial in establishing effective communication between your game and the player. Avoid isolating yourself within a realm of intricate and innovative ideas that may be difficult for others to comprehend. Instead, actively engage with your audience, showcase your work, and foster a dialogue. Through this process, you will gain valuable insights into what resonates and what doesn’t, allowing you to refine your approach effectively.
Unlocking Artistic Potential: Moving Beyond Selected Art Styles
Within a team, there will always be various specialists who perceive the key game art style in their own unique ways and offer their ideas. While the ultimate decision rests with the designated decision-maker, having multiple equally viable options can alleviate their burden.
“Which one should I choose? These styles all look equally appealing.”
“What if I make the wrong choice among these options?”
These toxic questions tend to veer away from the core issue. The crux of the matter is selecting a visual tool that effectively represents the game’s form. Remember that it must seamlessly harmonize with the mechanics and effectively convey the necessary messages to the player throughout the game.
If you find yourself hesitating between several similar styles, it indicates a lack of complete understanding regarding the purpose and essence of your game. Placing excessive importance on visuals over other crucial aspects is an incorrect approach. It is inappropriate to treat the mechanics as if they were separate entities by laying out an array of disparate styles and attempting to force-fit them.
The solution lies in recalling the imperative of aligning form with content. Revisit your game and vocalize its essence and intended message to the players. When you possess a clear vision of the game’s purpose, visuals and mechanics will no longer exist as separate entities. The synergy between these elements creates the gaming experience. Thus, with a thorough comprehension of its purpose, you will instinctively know the style needed, as if it were a perfect puzzle piece, seamlessly fitting into the complete picture.
Essential Art Styles for Gaming
While game art styles lack a definitive and universally recognized taxonomy, game developers commonly identify key categories based on their distinctive features. For instance, in the realm of 3D games, notable styles include:
- Realism
- Fantasy realism
- Low poly
- Hand-painted
- Cartoon
| Art Style | Description |
|---|---|
| Realism | Displays characters and environments in the most realistic way as close as possible to real life. |
| Fantasy realism | Displays characters and environments in a realistic setting that is impossible in our real life: fantasy, steampunk, sci-fi, etc. |
| Low poly | Displaying characters and environments through densely spaced geometric shapes with a combination of light and shadow. |
| Hand-painted | Displaying characters and environments with hand-drawn textures: shadows and highlights are drawn on the texture without geometry. |
| Cartoon | Displays characters and environments using low poly and hand-painted techniques with high color and custom proportions. |
Here are some examples of games that utilize different art styles:
- Cartoon: Tails of Iron, Minecraft, Dragon Ball FighterZ, Overwatch – These games utilize a cartoon art style, featuring vibrant and exaggerated visuals reminiscent of animated cartoons.
- Realism: Insurgency: Sandstorm, Red Dead Redemption 2, Battlefield 1, Crysis 2 – These games aim for a realistic art style, striving to depict graphics that closely resemble the real world with high levels of detail and fidelity.
- Hand-painted: SpeedRunners, Hades, Spiritfarer, Hollow Knight – These games showcase a hand-painted art style, where the visuals are created by hand, often with brush strokes and textures that add a unique and artistic flair.
- Low-poly: Divine Knockout (DKO), Borderlands, Okami, The Legend of Zelda: Breath of the Wild – These games employ a low-poly art style, characterized by simplistic and geometrically-shaped models with fewer polygons, resulting in a more minimalist aesthetic.
- Fantasy realism: Eternal Cylinder, Elden Ring, Skyrim, Fallout 4 – These games combine elements of fantasy and realism, blending imaginative and fantastical elements with visuals that strive for a high level of realism.
When it comes to 2D game art styles, we can identify the following categories:
- Flat
- Pixel
- Vector
- Realism
- Cel shading
- Monochromatic
| Art Style | Description |
|---|---|
| Flat | Displaying characters and environments without shadows and the illusion of volume as if they were cut out of paper. |
| Pixel | Displaying characters and environments in the form of pixels – indivisible elements of a rectangular or round shape, characterized by a certain color. |
| Vector | Displaying characters and environments based on vector graphics – these are images drawn using mathematical formulas. |
| Realism | Displaying characters and environments in the most realistic way possible with shadows, the illusion of volume, tints, and lighting. |
| Cel shading | Displaying characters and environments using non-photorealistic rendering to obtain an image that mimics hand-drawing with hard contours and sharp chiaroscuro transitions. |
| Monochromatic | Displays characters and environments in a limited color palette of 1 or 2 colors and a wide range of shades of these primary colors. |
Here are some examples of games that use different art styles:
- Flat: Gravity Defied, Nidhogg, Alto’s Adventure, Fez, To the Moon, Undertale, Owlboy – These games employ a flat art style, characterized by two-dimensional, simplified visuals without shading or depth.
- Pixel: Undertale, Noita, Steamworld Heist, Red Alarm, The Banner Saga, Ghost Trick, To the Moon – These games feature pixel art, which uses small, square-shaped pixels to create a retro, nostalgic aesthetic reminiscent of older video games.
- Monochromatic: Limbo, Badlands, Inside, Minit, One Upon Light – These games utilize a monochromatic art style, typically using shades of black, white, and gray to create a stark, atmospheric atmosphere.
- Cel shading: Ultimate Spider-Man, Jet Set Radio Future, Mega Man Legends, Pokémon X & Y, X-Men Legends – These games employ cel shading, a technique that gives the illusion of hand-drawn animation by using flat, solid colors and bold outlines.
- Vector: Steamworld Heist, Red Alarm, The Banner Saga, Ghost Trick – These games utilize vector art, which relies on mathematical formulas to create smooth, scalable graphics. This style is often associated with clean lines and vibrant colors.
When it comes to realistic 2D graphics, they typically utilize raster graphics, which consist of a grid of pixels. On the other hand, vector graphics are better suited for cartoonish or stylized visuals due to their ability to scale without losing quality. You can learn more about the differences between raster and vector 2D graphics in the corresponding post.
Games with Distinctive Artistic Styles
Video games with exceptional and one-of-a-kind art styles offer far more than mere visual appeal; they create immersive experiences that captivate players on multiple levels. Here’s why these games are a sensory feast:
Atmospheric Ambiance: The distinctive graphic styles in these games contribute to an overall ambiance that transports players into rich and immersive worlds, heightening their sense of immersion and engagement.
Character Identity: Unique art styles often extend to the game’s characters, giving them distinct visual identities that make them instantly recognizable and memorable. These visuals enhance the connection between players and the game’s cast, making their interactions all the more compelling.
Narrative Enhancement: Visual artistry plays a pivotal role in storytelling, and games with exceptional art styles effectively leverage this. The visuals not only serve as a backdrop but also contribute to the narrative, enhancing the storytelling experience and drawing players deeper into the game’s world.
Unforgettable Aesthetic: The best games with extraordinary art styles leave an indelible mark, etching themselves into players’ collective memory. Their unique aesthetics make them stand out among the vast sea of games, creating an enduring impact and fostering a sense of admiration and appreciation among players.
Selecting the Ideal Art Style for Your Game
Now that we have explored the primary art styles commonly used in games, let’s summarize the key questions you need to answer in order to choose the perfect art style for your game.
What Resources Are Available to You?
Considering your financial and resource capabilities is crucial when embarking on game development. Recognize that creating an ultra-realistic game with complex open-world mechanics single-handedly may be beyond your current capabilities. Start by outlining your limitations upfront to determine what is currently unattainable. This pragmatic approach will simplify the decision-making process when selecting a suitable art style.
Defining the Essence of the Game
Consider what concept lies at the heart of your game. Is it set in a post-apocalyptic world, portraying the untamed power of nature, exploring the depths of sinister space, contemplating philosophical musings on life’s meaning, or a fast-paced shooter with a classic antagonist seeking to destroy the world? The chosen art style should align with the intended message you wish to convey to players.
Understanding the Target Audience
Remember, not every game is meant for a global audience. Identify the specific target audience for your game and gain an understanding of their needs, preferences, and expectations. Step into their shoes and envision how you would want the game to be from a consumer’s perspective. By empathizing with your target players, you can make informed decisions regarding the art style that will resonate most with them.
Conclusion

In reality, there is no definitive “best” game art style. Any art style can be the perfect fit for your specific idea. What truly matters is understanding the essence of your game and aligning your aspirations with your financial and resource constraints.
At Kevuru Games, we possess extensive knowledge of the latest art styles for games and have successfully crafted visual designs for a diverse range of projects, spanning from casual to AAA titles. If you find yourself grappling with the decision of choosing a style, feel free to reach out to us. We are here to assist you in discovering the ideal stylistic direction for your game. Moreover, if needed, we can create the artwork you require, be it individual elements or the entire visual representation of your game.
The post Artistic Choices in Video Game Visuals appeared first on Pad-TheGamers.
]]>The post Saves In Game Dev Tycoon: A Comprehensive Guide To Deleting appeared first on Pad-TheGamers.
]]>However, as you embark on this exhilarating journey, you may find yourself facing a common dilemma: what to do with unwanted game saves. Whether you’re seeking a fresh start, aiming to declutter your game library, or simply looking for a way to optimize your gaming experience, deleting saves in Game Dev Tycoon becomes an essential skill to master.
Understanding the Importance of Deleting Saves
Before we delve into the details of deleting saves in Game Dev Tycoon, let’s first understand why it is essential to manage your game saves effectively. Deleting saves allows you to:
1. Free Up Storage Space: Over time, your game library may accumulate numerous saves, taking up valuable storage space on your computer. By deleting unnecessary saves, you can optimize your storage and ensure smooth gameplay.
2. Organize Your Game Library: Deleting unwanted saves helps you maintain a well-organized game library, making it easier to find and access your favorite games without clutter.
3. Start Fresh: Deleting saves can give you a clean slate, enabling you to embark on new adventures and create fresh game strategies without the burden of previous progress.
Step-by-Step Guide to Deleting Saves
Now that you understand the importance of deleting saves, let’s explore the step-by-step process to delete saves in Game Dev Tycoon:
Now that we understand the importance of deleting saves, let’s delve into the step-by-step process to delete saves in Game Dev Tycoon. By following these instructions, you’ll be able to effortlessly remove unwanted saves from your game library.
Step 1: Launching the Game Dev Tycoon Application
To begin, locate the Game Dev Tycoon application on your computer or gaming console. Ensure that you have the latest version of the game installed to access all the features and functionalities required for deleting saves.
Step 2: Accessing the Main Menu
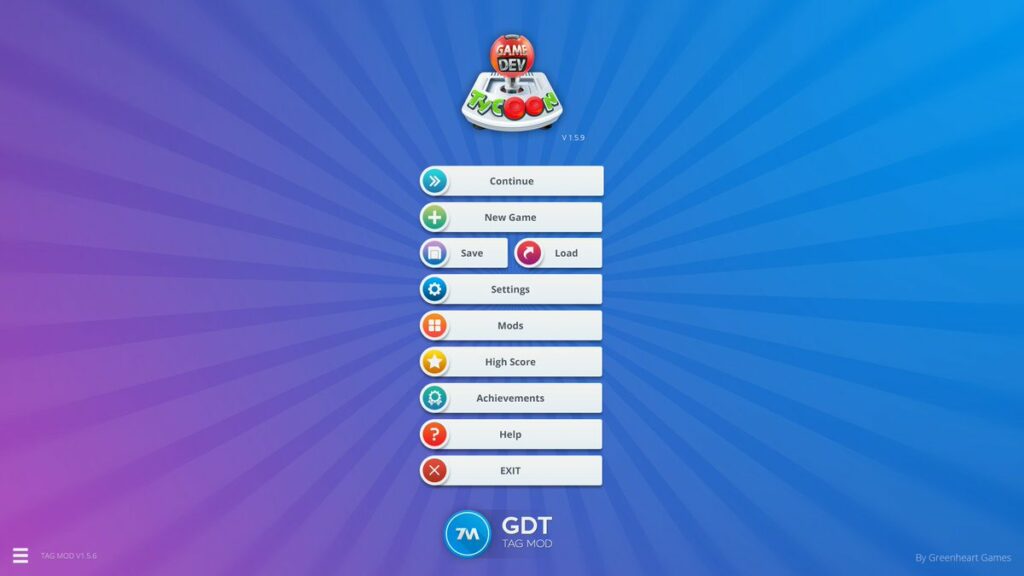
Once you’ve launched the Game Dev Tycoon application, you will be greeted by the main menu. This menu serves as the central hub from which you can access various options and settings to customize your gameplay experience.
Step 3: Navigating to the Load Game Screen
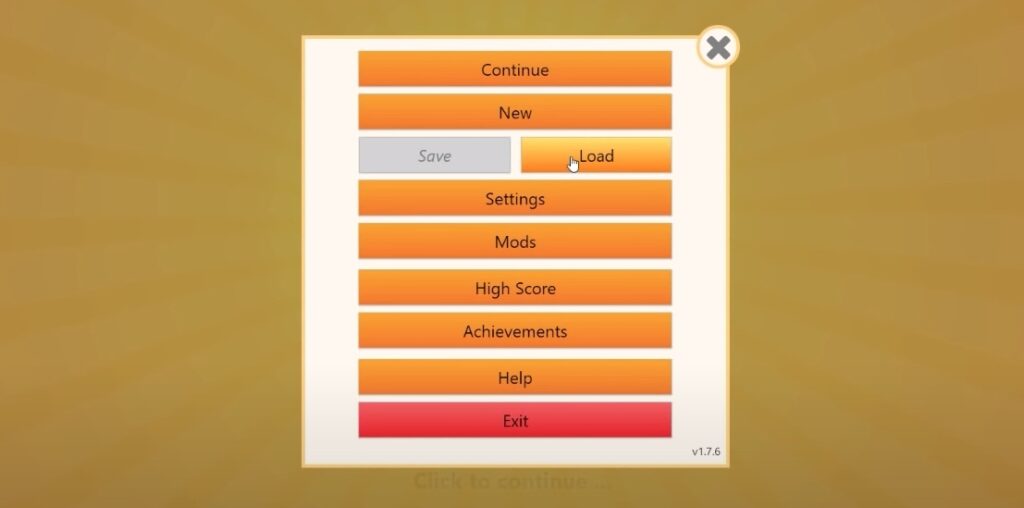
In the main menu, you’ll find an option labeled “Load Game.” Click on this option to navigate to the load game screen, which displays all you’re existing game saves.
Step 4: Selecting the Save to Delete
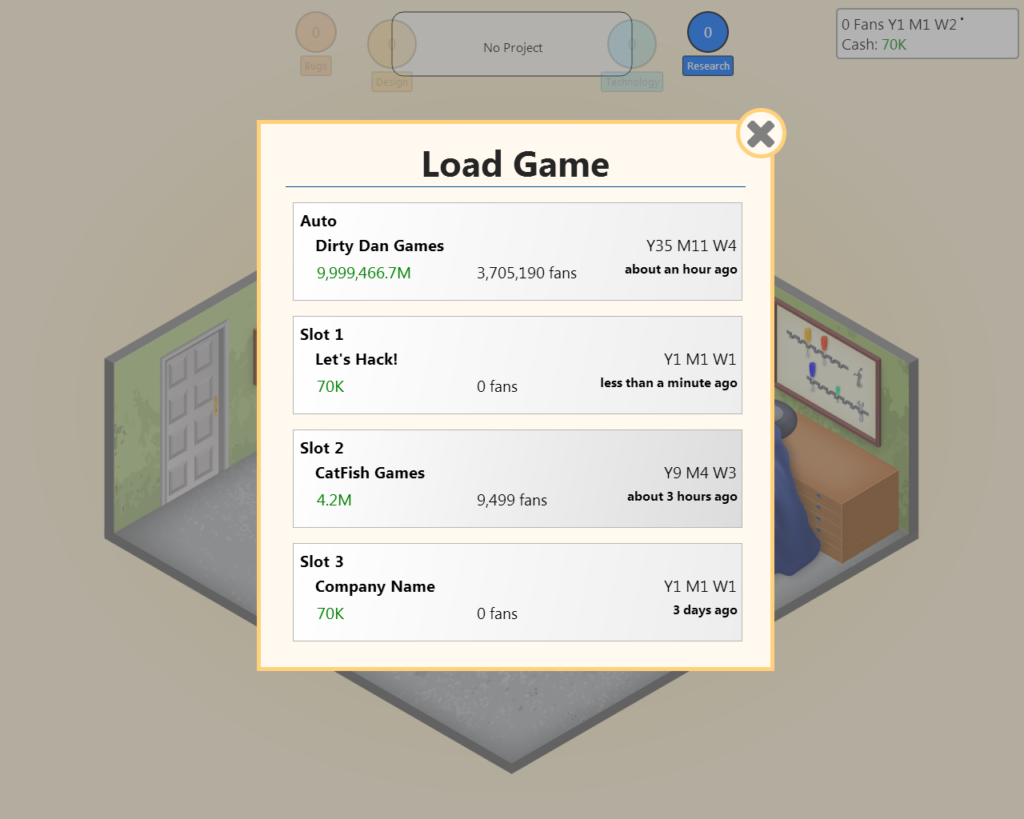
On the load game screen, you will see a list of all the game saves associated with your profile. Take a moment to identify the specific save that you wish to delete. You can refer to the game titles, save dates, or any other relevant information to make the selection process easier.
Step 5: Deleting the Save
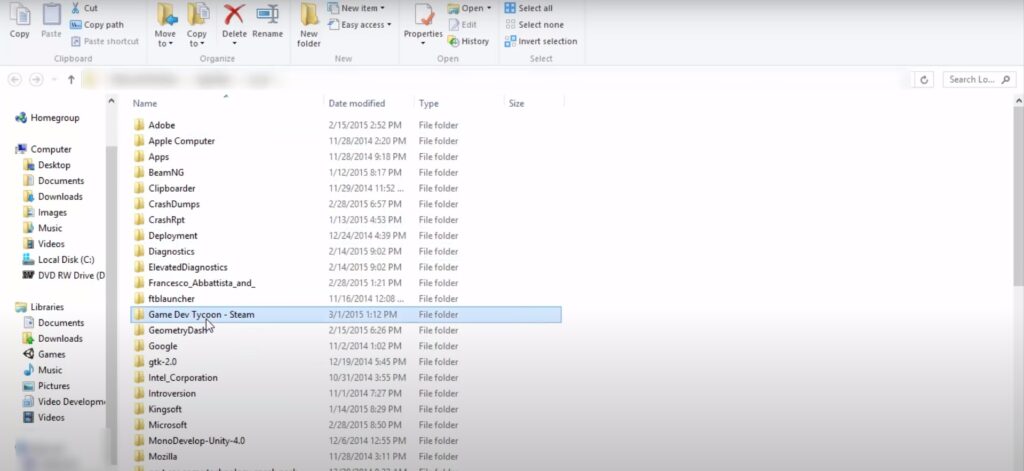
Once you have identified the save you want to delete, select it by clicking on it. This action will highlight the save and allow you to proceed with the deletion process. Look for the delete option, usually represented by a trash bin icon or a delete button. Click on this option to initiate the deletion.
Step 6: Confirming the Deletion
In some cases, Game Dev Tycoon may prompt you to confirm the deletion of the selected save. This additional step serves as a safety net to prevent accidental deletions. Take a moment to review the confirmation message and ensure that you are deleting the correct save. Once you’re certain, click on the appropriate button or option to confirm the deletion.
Step 7: Verifying the Deletion
After confirming the deletion, the game will remove the selected save from your game library. To verify the successful deletion, return to the load game screen. The deleted save should no longer be visible among the list of available saves.
Tips and Best Practices
Deleting saves in Game Dev Tycoon is a straightforward process, but here are some additional tips and best practices to enhance your overall gaming experience and make the most out of your save management:
Back Up Important Saves:
Before you embark on deleting any saves, it’s always wise to back up your most important or cherished game progress. This precautionary measure ensures that you have a safety net in case you want to revisit or restore specific milestones or achievements in the future. Consider utilizing external storage devices or cloud storage services to store your backup saves securely.
Utilize Save Slot Management:
One of the fantastic features of Game Dev Tycoon is the ability to have multiple save slots. Take full advantage of this functionality by utilizing different slots for various purposes. Reserve specific slots for different game progress, experiments, or alternate playthroughs. By assigning specific saves to individual slots, you can easily switch between different game states without the need to frequently delete saves. This not only saves time but also allows you to explore different strategies or game variations at your leisure.
Regularly Review and Cleanse Your Game Library:
As your gaming journey evolves and progresses, it’s important to periodically review your saved games and delete those that you no longer require. Over time, you may find that certain saves become redundant or less relevant as you move on to new projects or challenges. By regularly cleansing your game library, you can keep it organized and streamlined, making it easier to locate and access the saves that matter most to you. Consider setting a schedule or reminder to perform this review process on a regular basis, ensuring that your game library remains clutter-free and optimized.
Document and Keep Track of Save Details:
As you accumulate more saves in Game Dev Tycoon, it can become challenging to remember the specific details or context of each save file. To facilitate organization and decision-making when it comes to deleting saves, consider creating a separate document or spreadsheet to record essential information about each save. This can include details such as the game title, playtime, progress achieved, and any other relevant notes. By keeping track of these details, you can make informed decisions about which saves to keep and which to delete, based on your current gaming goals and preferences.
Share Saves with the Game Dev Tycoon Community:
Game Dev Tycoon has a vibrant and passionate community of players who love to share their game saves and experiences. If you have saves that you no longer need or wish to pass on to others, consider sharing them with the community. This can be a great way to engage with fellow players, exchange ideas, and provide others with the opportunity to explore your game progress or strategies. Various online platforms and forums dedicated to Game Dev Tycoon offer avenues for sharing saves, enabling you to contribute to the community while optimizing your own game library.
By implementing these tips and best practices, you can elevate your game management skills, keep your game library organized and efficient, and ensure a seamless and enjoyable gaming experience in Game Dev Tycoon.

Table – Game Dev Tycoon Save Deletion Shortcuts
For quick reference, here is a table summarizing the key shortcuts and steps involved in deleting saves in Game Dev Tycoon:
| Shortcut/Step | Description |
|---|---|
| Step 1 | Launch the Game Dev Tycoon application |
| Step 2 | Access the main menu |
| Step 3 | Navigate to the load game screen |
| Step 4 | Select the save to delete |
| Step 5 | Delete the save |
| Step 6 | Confirm the deletion |
| Step 7 | Verify the deletion |
Conclusion
Deleting saves in Game Dev Tycoon is a simple yet crucial task that allows you to take control of your game library and optimize your gaming experience. By following the step-by-step guide provided in this article, you now possess the knowledge and skills to effortlessly delete unwanted saves, free up storage space, and organize your game collection with ease.
In addition to the step-by-step process, we have also shared some valuable tips and best practices to enhance your overall gaming experience. Backing up important saves ensures that you can restore significant progress or revisit cherished moments in the future. Utilizing save slots strategically allows for experimentation and multiple playthroughs without the need to frequently delete saves.
Regularly reviewing and cleansing your game library is essential for maintaining an organized and efficient collection. As you continue your journey in Game Dev Tycoon, periodically assess your saves, delete those that are no longer needed or relevant, and make room for new gaming adventures.
Remember, deleting saves is not only about decluttering and organizing your game library, but also about embracing the opportunity for a fresh start. Starting anew allows you to unleash your creativity, explore innovative strategies, and build upon your previous experiences without being tied down by past progress.
So, armed with this knowledge and understanding, go forth and conquer the virtual world of game development in Game Dev Tycoon. Delete saves confidently, optimize your gaming experience, and embark on new and exciting adventures that await you. Happy gaming!
The post Saves In Game Dev Tycoon: A Comprehensive Guide To Deleting appeared first on Pad-TheGamers.
]]>